 Netherlands (English)
 België
 Deutschland
 Finland
 Ireland
 Luxembourg
 Portugal
 Poland
 Österreich
 France
 España
 Italia
 Sverige
 Danmark


![How to design a route with Komoot [How-To]](http://cdn.mantel.com/images/page?image_id=6065&w=400)
How to design a route with Komoot [How-To]
Designing your own bike routes sounds harder than it actually is. As a cycling enthusiast you're always looking for new routes to discover and explore, but finding routes that suit your experience and preferences can be difficult. Fortunately, there's the Komoot route planner, which is designed especially for cyclists! Whether you want to go on a quiet ride on local bike paths or are planning an adventurous trip abroad, it's all possible with Komoot. In this blog post you'll learn more about what Komoot is, how it works, what it costs and how it can add to your cycling experience.
What is Komoot?
Komoot is an app designed especially for cyclists (and hikers) to discover, create and share routes. It also offers a navigation feature, and has a wide range of cycling routes from all around the world. You can easily transfer these to your favourite bike computer. These routes were designed by a community of cyclists and adventurers who share their knowledge and experience in order to help others have great cycling trips. Anyone can find a suitable route on Komoot, or easily plan one themselves. Whether you have a gravel bike, road bike, mountain bike or ebike, Komoot has a route for you.

How do you create a route in Komoot?
Let's start at the beginning. Open the route planner and first choose your preferred (cycling) sport: MTB (singletracks and trails, as little asphalt as possible), Touring (bike paths and quiet asphalt roads), or Cycling (fast asphalt roads and bike paths). Then you determine the starting point, waypoint A, either by clicking on the map, entering an address or simply by selecting your current location. If you want to cycle from A to B, choose your end point B on the map the same way you choose your starting point.
Pro tip: If you'd like to go for a round trip, we recommend setting the furthest point as your end point, and first adjusting this one-way route to your liking. Only change your route type to out and back once you're satisfied with the one-way version, and then adjust the route back to your liking. Komoot automatically chooses the most suitable route for your chosen sport between two waypoints. That means that if you only specify a start and end point, Komoot will offer you the same outward and return route.
How do you pick the best waypoints?
This is where the Komoot route planner excels in comparison to other route planners. There are multiple types of waypoints you can use to make your route even better: Komoot Highlights, Points of Interest (POIs) and Trail View photos taken by other Komoot users during their Tours. You can also grab the blue route line and drag it to an area you'd like to cycle through (such as nature areas), or drag the line away from areas you want to avoid (such as towns or cities). If you release the line, a new waypoint will appear at that spot. Simply clicking or tapping on the map is also a way to add waypoints.

Highlights
Highlights are locations or route segments recommended by other Komoot users. Tips from experts, essentially! Often, through photos and tips from multiple users, you'll find additional information about Highlights so you can decide whether or not to add them to your route.
POI
Points of Interest are divided into categories, such as restaurants and cafes, parking spots, camping spots and water fountains. Clicking on the white search bar at the top left of the (desktop) planner opens a list of POIs that you can tick to make them visible on the map (in the app, you can click on a green waypoint bar to see the POIs and have to choose a single category, instead of several at once like on a desktop). You add a POI to your route by clicking the icon on the map, just like you do with Highlights.
Trail View
Trail View is just that: trail view. It's kind of like Google Street View but for unpaved trails! These photos are uploaded by Komoot users themselves. They're taken en route, uploaded and checked for quality by Komoot, so you'll only find sharp photos that give a realistic impression of the environment and terrain. This way you can find out whether a path might be too sandy for your road bike or too narrow for a busy weekend day.
That covers Komoot's main route planning features, and you can get started on creating your own route! For more information, you can have a look at the Komoot Online Help Guide . If you have a specific question, visit Komoot support and enter your question's subject in the search bar.
What does Komoot cost?
The Komoot route planner is free to use. After you have planned a route you can start navigating directly in the app. Do you want to navigate offline or synchronise your route to your navigation device? Then you'll need to own the map on which your starting point is located. You'll get your first region for free when making a Komoot account. Additional regions cost €3.99 each, a Region Package costs €8.99 and for €29.99 you can buy the entire Komoot World Package. These are one-time payments! More info on Komoot's maps and the Komoot Premium subscription can be found here.
Some final tips!
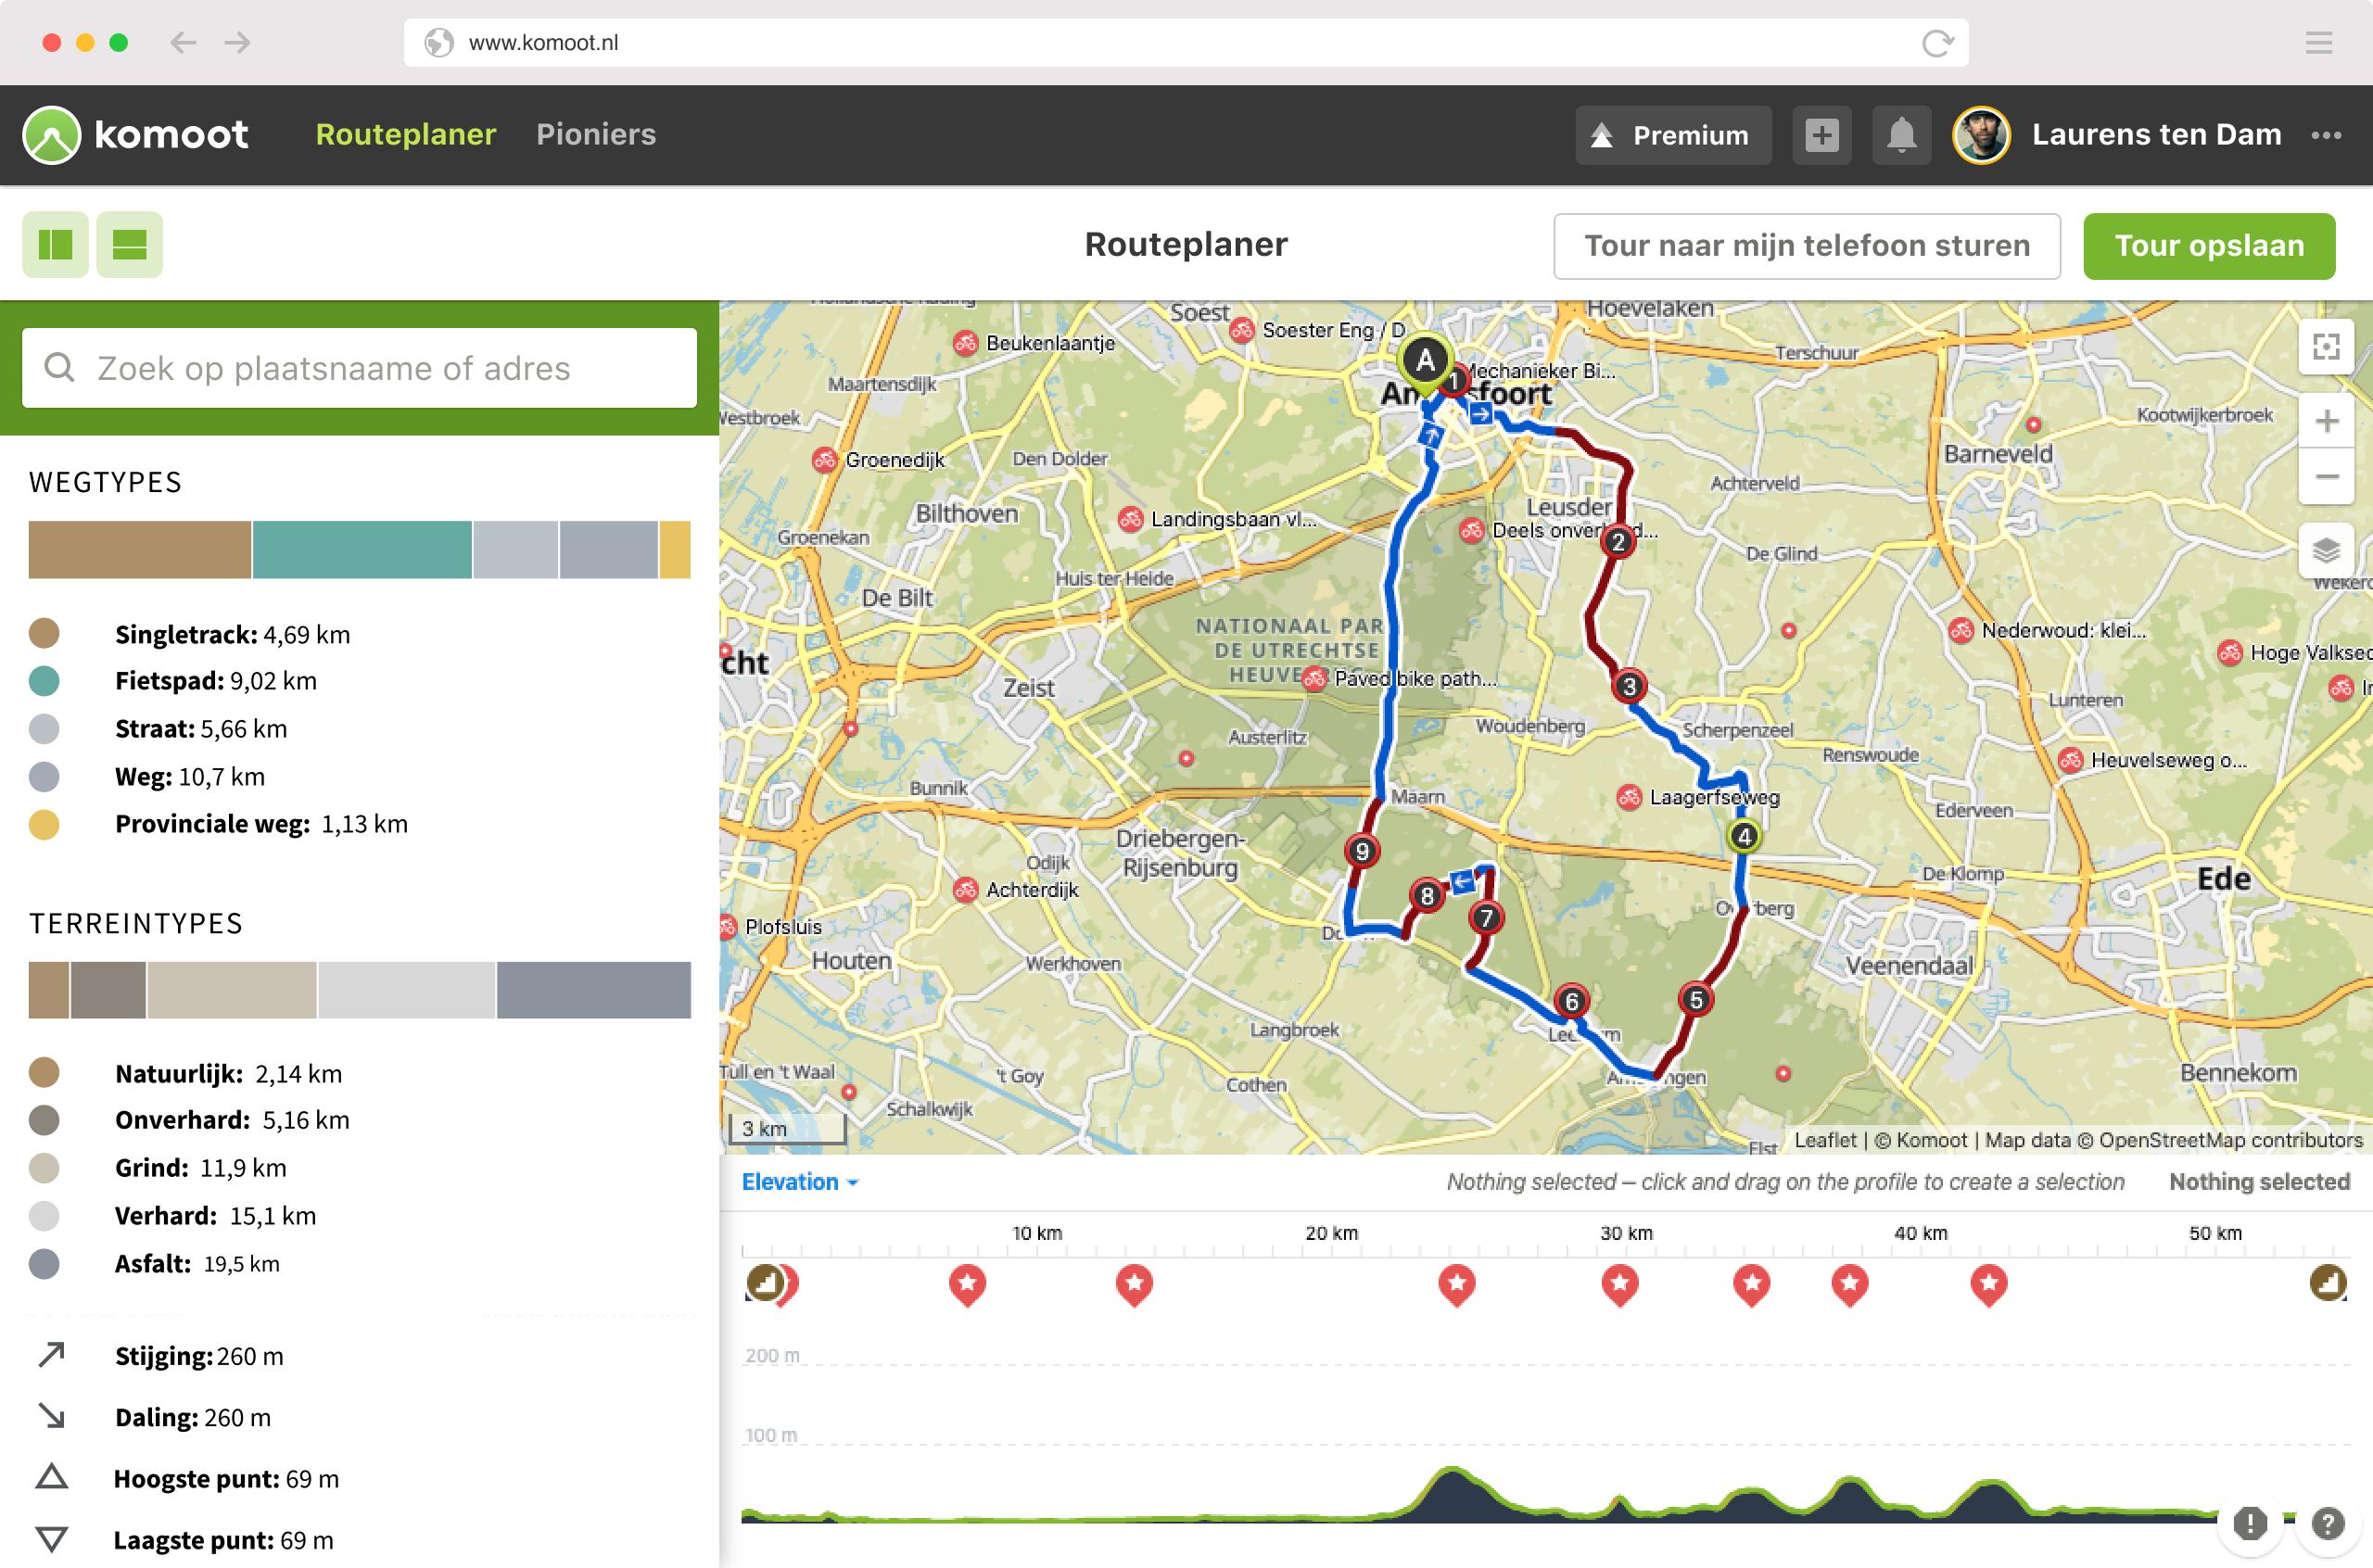
Road types and surfaces
In the left menu bar in the desktop route planner (in the app, scroll to the bottom while in the planner), you can see an overview of both the road type and the terrain types included in your route. For example, you can locate segments of roads with high speed limits for cars and remove them from your route by dragging the blue line over to another road. You can also use the menu to see exactly how many kilometres of, for example, bike path, gravel or singletracks are in your route. This allows you to adjust your route accordingly and avoid nasty surprises along the way.
Altitude profile
Heading for the mountains? Then the altitude profile in the route planner will come in handy. It shows you where the steep climbs in your route are, how long they are and at what point in your route you start the climb.
Map layers
You can use different map layers during planning. The satellite map clearly shows nature reserves, sandy plains, inhabited areas and mountain landscapes, and in the Open Cycle Map map layer you can find all nodes that connect official Dutch bike paths, for example. You can also activate the Trail View (the green collections with pictures of unpaved paths) on the map via the map icon.
Have fun planning your next route!
Mark Jansen
When I was introduced to cycling a few years ago, I was immediately hooked. There are so many different ways to enjoy cycling, from leisurely rides and adventures to tough climbs and races. I do a lot of cycling myself, both road and mountain biking. In addition to commuting to work, I also do touring and training rides. In the future I hope to do a lot of trips abroad!
Related posts

How to pair a Wahoo turbo trainer successfully with Zwift and Strava
5 November 2025A Wahoo turbo trainer is a great way to train indoors - but it can be difficult sometimes to pair it correctly with ...

Want to bring your bike with you on holiday? Discover the easiest ways to transport your bike by car, bus, train or airplane!
3 July 2024Bringing your bike will make your holiday even more fun ...