 Nederland
 België
 Deutschland
 United Kingdom
 Finland
 Ireland
 Luxembourg
 Portugal
 Poland
 Österreich
 France
 España
 Italia
 Sverige
 Danmark


Derailleur adjustment - How can I get my derailleur shifting smoothly again? [How-to]
It's one of the greatest irritations in mountain biking and road cycling: a derailleur that shifts badly. Just as you arrive at the steepest section on Mount Ventoux your derailleur refuses to shift smoothly into a lighter gear. On top of costing you power, it costs you a heap of time. Precisely the two things that you don't need while cycling up a mountain. Derailleur adjustment is therefore a very important thing to do whenever you head out on your bike. In this blog we'll give you a step-by-step guide on how best to do this, to get you shifting smoothly again on the road or in the forests.
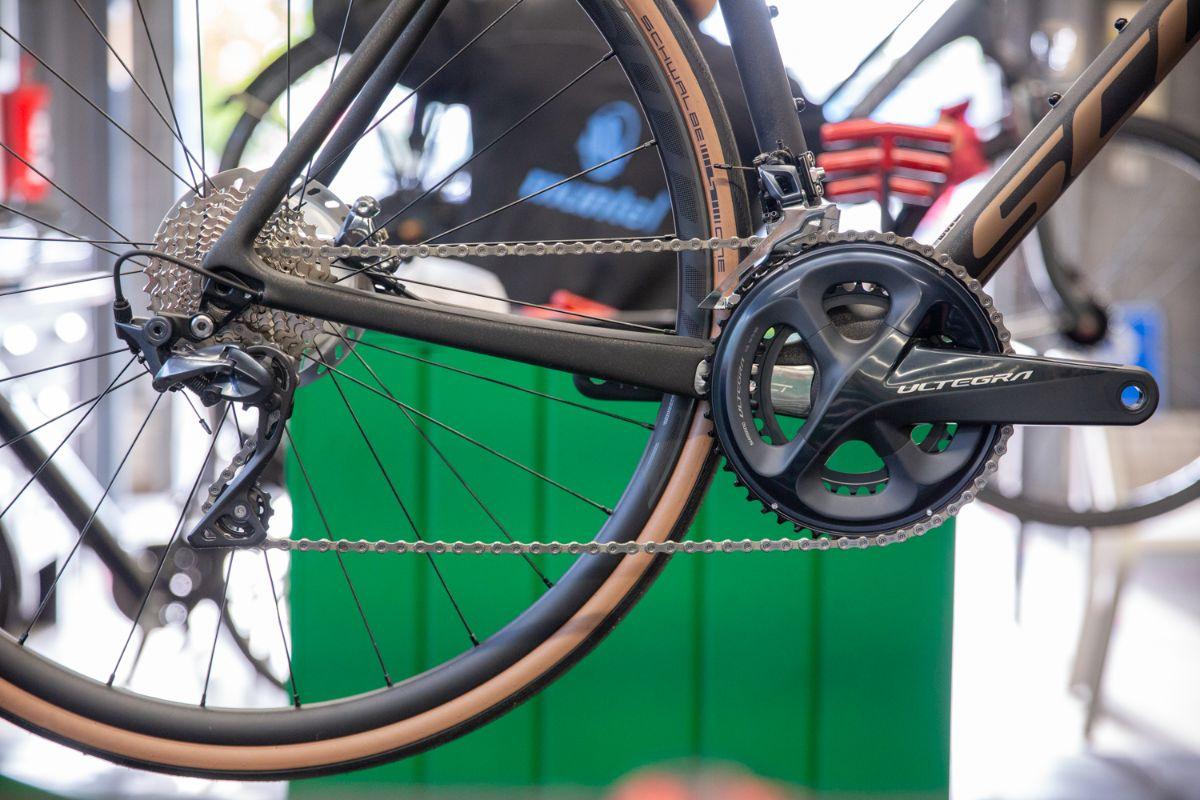
Many bikes have a front and a rear derailleur. The rear derailleur acts as a sort of guide for the chain. This ensures that you can shift properly between the chainrings. The rear derailleur ensures that the chain maintains good tension, so that your shifting remains smooth. You need to tune your derailleur to keep your bike shifting effortlessly.

So in this blog you'll find out how to tune your front and rear derailleurs well. Often setting the cable tension is enough to get your derailleur shifting well, so you'll read about how best to do this first. If that isn't sufficient, then you'll need to adjust the limit screws. In this blog you can also read about:
- Setting front derailleur cable tension
- Setting rear derailleur cable tension
- Front derailleur adjustment
- Rear derailleur adjustment
Setting the cable tension on a front derailleur
Sometimes the cable tension of the front derailleur needs to be set to get the bike shifting smoothly again. When the cable of the front derailleur is a bit old the inner cable doesn't slide through the cable housing as easily. As a result, the shifting is less smooth and sometimes you find yourself having to push the gear lever twice to get the chain to shift onto the outer chainring.
For this reason lots of bikes come with barrel adjusters which, when turned, make the cable tighter or looser. For the front derailleur, these are found at the bars where the shifter connects to the cable, or on the down tube. 11-speed Shimano MTB front derailleurs and Dura-Ace R9100, Ultegra R8000 and 105 R7000 road bike front derailleurs all have built in cable tensioning.
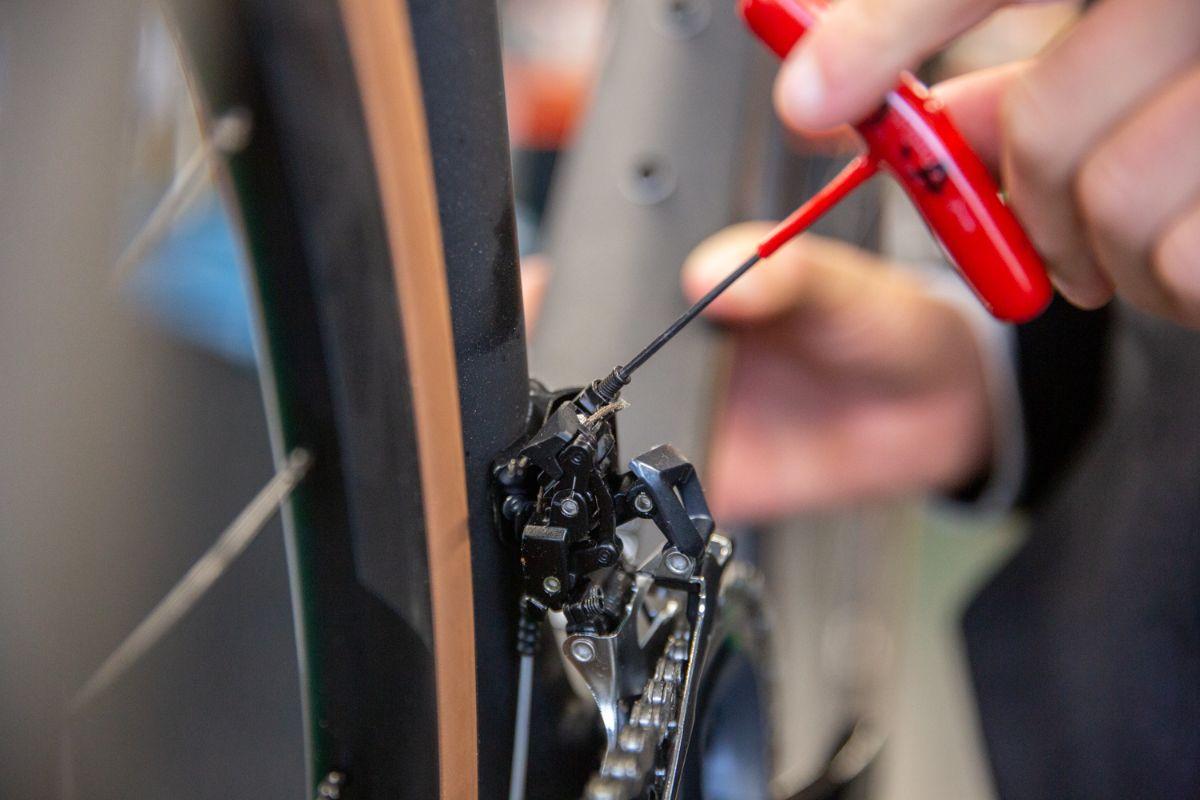
Setting the cable tension on a rear derailleur
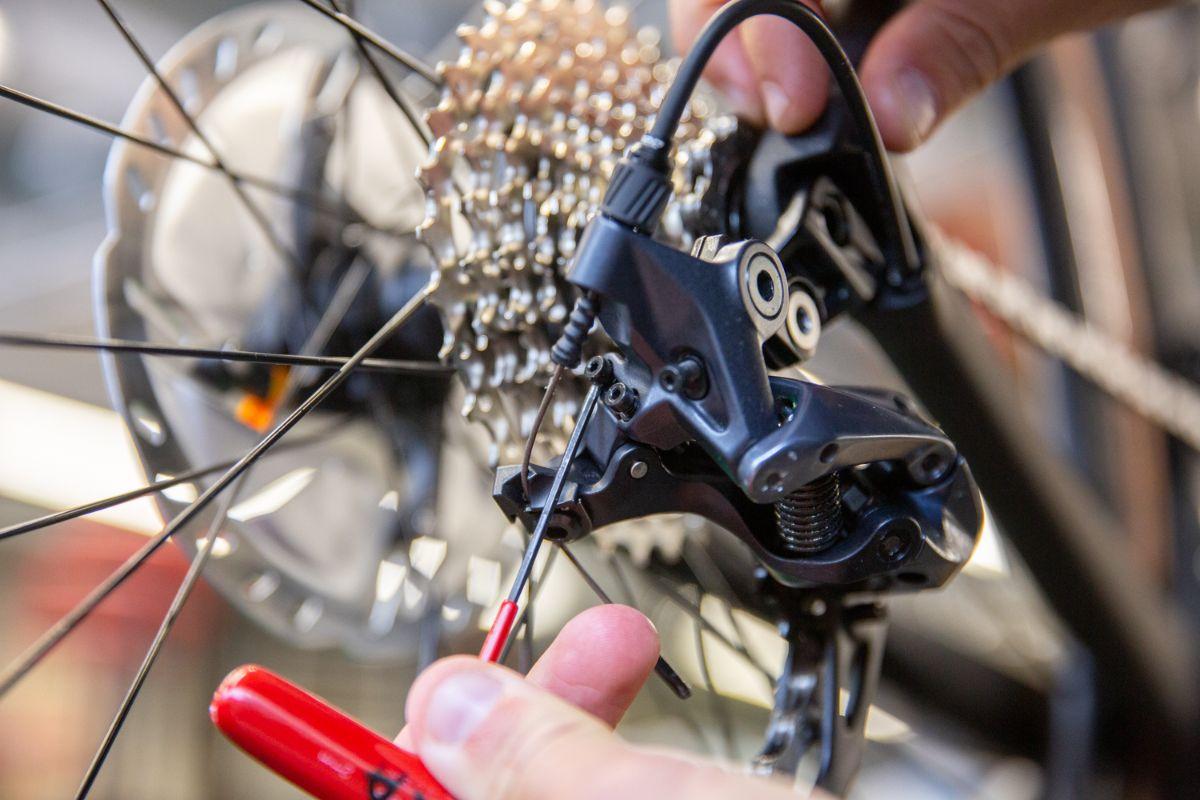
To get things shifting smoothly again, it's important that you set the tension of the rear derailleur correctly. For this you need a screwdriver or a 2 mm Allen key.
Setting the cable tension will get your rear derailleur shifting smoothly again. Simply put, if your derailleur won't shift easily to a harder gear, the cable tension needs to be reduced. If the derailleur is having trouble shifting into a lighter gear, then the cable tension needs to be increased.
1. Shift your derailleur to the hardest gear, so onto the smallest cog on your cassette.

2. To adjust the cable tension you'll need to find the barrel adjuster. You'll find it where the cable enters the rear derailleur.

3. If you want to set the cable tensioning accurately, it's best to start at zero clicks. So, in other words, screw the barrel adjuster all the way in (clockwise in relation to the derailleur) so that the cable tension is at its lowest.
4. Now shift to a lighter gear. If the derailleur doesn't want to shift to a higher cog, add more tension to the cable by turning the barrel adjuster one click anti-clockwise. Try shifting again. Keep repeating this process of increasing the tension by a click and then testing the shifting response until the derailleur shifts up smoothly.
5. With that done, shift all the way up through the cassette, so continually upward towards a lighter gear. Add tension as needed.
6. Once you reach the largest cog, try shifting back down into a harder gear. If it doesn't work, decrease the cable tension by turning the barrel adjuster by one click. Repeat that until it shifts down smoothly.
7. Shift back down through your cassette, reducing the tension as needed.
8. Once you reach the smallest cog, try shifting up again. Ultimately you keep repeating the process until you find the optimum cable tension that allows you to shift up and down smoothly.
Important:
Shimano Dura-Ace R9100, Ultegra R8000 and 105 R7000 rear derailleurs have a safety device (lock function) on the barrel adjuster. This sort of barrel adjuster needs to first be lifted slightly upwards before you can turn it in or out.
Front derailleur adjustment
As mentioned earlier, your derailleur issues could be resolved just by setting the cable tension. If that isn't enough, read on below about how you can do a front derailleur adjustment.
Time required: 15 minutes
For this job you'll need an Allen key or a screwdriver.
-
Hang the bike up, so that the rear wheel can rotate freely.
So that the rear wheel can turn freely, it's handy to hang your bike on a bike stand or bike hook. Of course not everyone has a bike stand, or you could be on holiday without one. In that case you can turn your bike upside-down, so that the rear wheel can spin freely. Important: If your bike has disc brakes, be careful not to pull the levers while the bike is upside-down, because that could lead to air bubbles in the cables, which will reduce the effectiveness of your brakes.
-
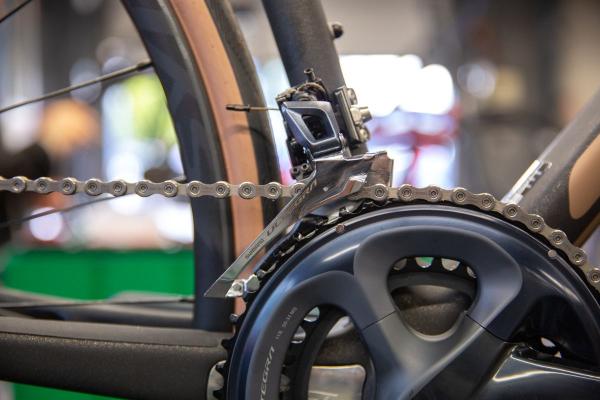
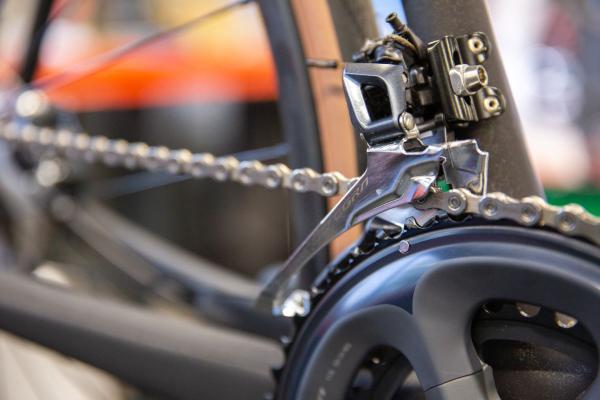
Check the height of your front derailleur.
t's important that your front derailleur is at the correct height, namely about 0.5 cm above the outer chainring when the chain is on the outer chainring. Normally you change the height of your front derailleur when mounting a smaller or larger chainring. Of course, when mounting a new derailleur you also need to set the front derailleur height.
-
Check that the position of the front derailleur is correct
After having the correct height, the position of your front derailleur is the next most important thing to check. Your derailleur should be parallel to your chainrings. The position of the derailleur cage really only changes if you change the crankset. If you mount a new derailleur you must, of course, align it. If the height and alignment of the front derailleur aren't correct, take the following steps: 1. Undo the cable from the front derailleur. 2. Reset the height of the front derailleur and set the cage parallel to the chainrings. 3. Pull the derailleur cable hand-tight and screw it back in.
-
Set the limit screw
To adjust the shifting limit on the inner chainring, place your chain on the inner chainring and one the largest cog on your cassette (so the lightest gear).
-
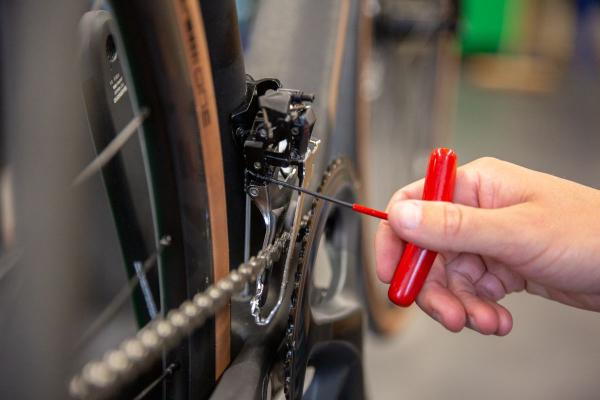
Adjust the front derailleur screws
There are two screws on the front derailleur marked L and H. You start by adjusting the L screw.
-
Adjust the L screw first
The L screw controls the inward travel of the front derailleur, to the point where it engages the lowest gear but not beyond, so that the chain doesn't fall off. L therefore stands for 'low gear’, so lightest gear. You adjust the L screw so the chain runs just alongside the inner side of the derailleur cage. If you turn the screw anti-clockwise, the derailleur cage moves inwards. If you turn the screw clockwise, the derailleur cage moves outwards.
-
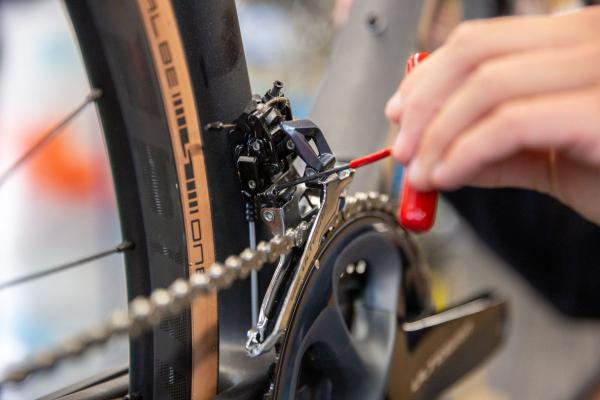
Adjust the outer chainring
Once you've adjusted the limit for the inner chainring, set the limit for the outer chainring. To do this you shift the derailleur to the outer chainring and the smallest cog on your cassette. You set this limit with the H screw. H stands for highest gear, in other words, your heaviest gear.
-
Adjust the H screw
Screw H is on the right hand side. The same applies here: if you turn the screw anti-clockwise, the derailleur cage moves inwards, and if you turn it clockwise, the derailleur cage will move outwards.
-
Ensure that the chain is now running alongside the outer edge of the derailleur cage
Here the chain is running just alongside the outer edge of the derailleur cage. That indicates the H screw has been correctly adjusted.


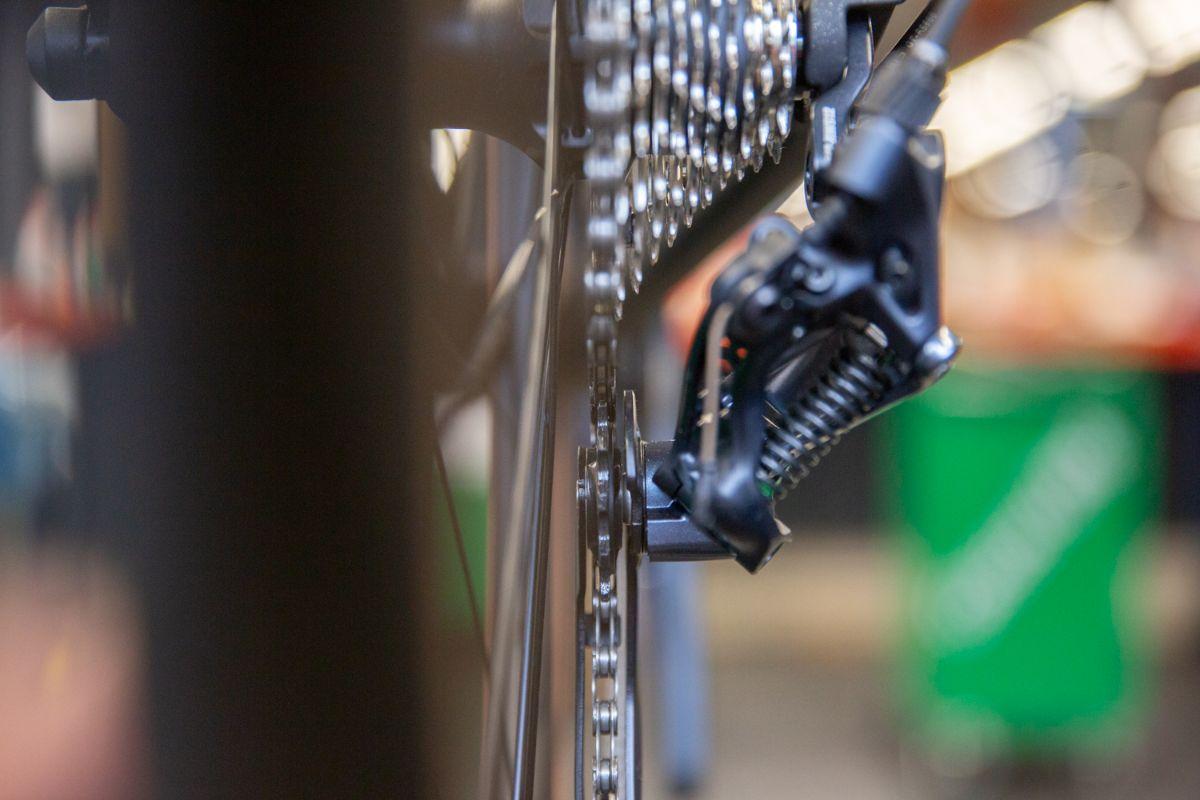
Rear derailleur adjustment
It's also important to adjust the limit screws on the rear derailleur. So, in other words, how far the derailleur can move inwards and outwards. Dimensions differ from one frame to the next, so there's no universal setting for these limits.
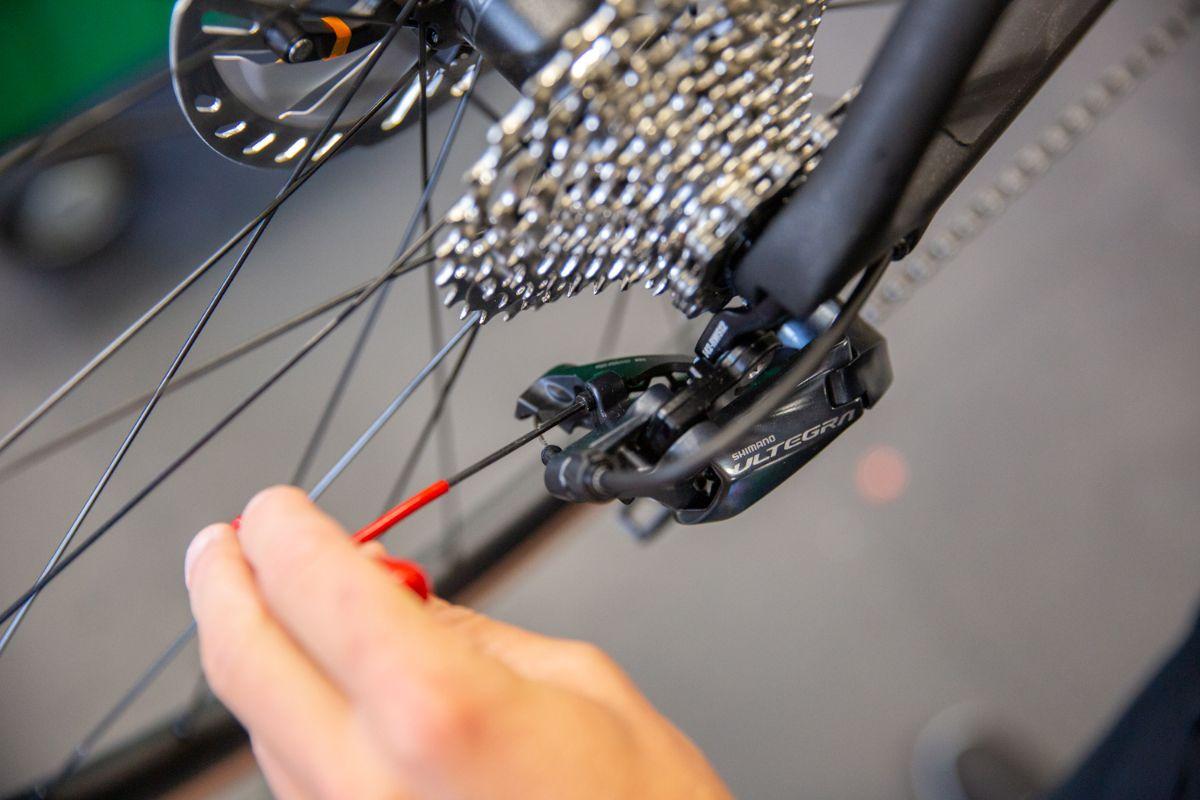
The adjustment of these limits is done with a screwdriver or an Allen key. So first check your derailleur to see which of these two tools you need.

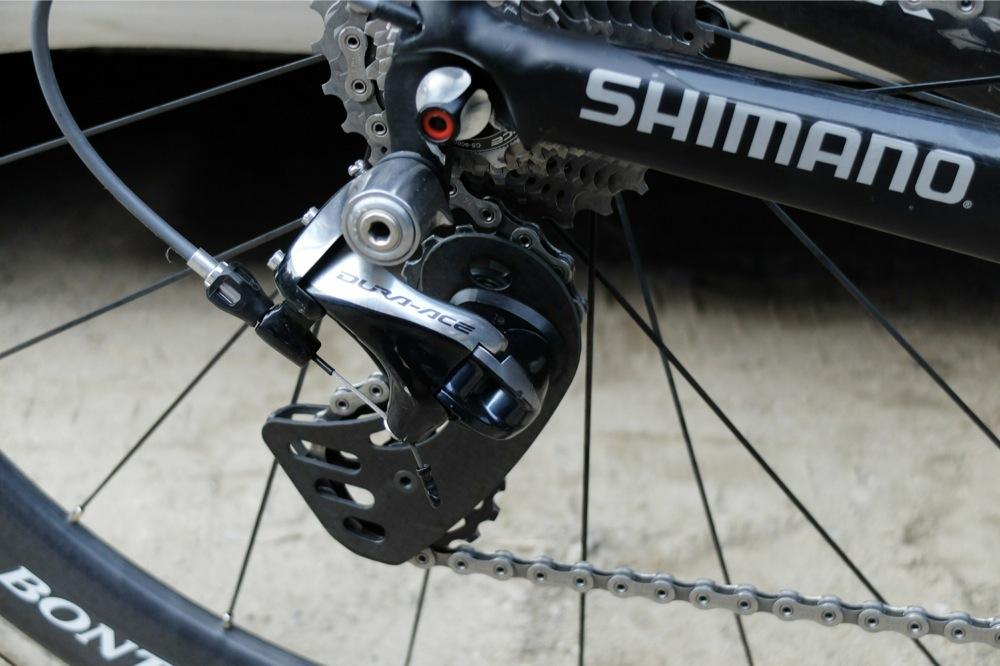
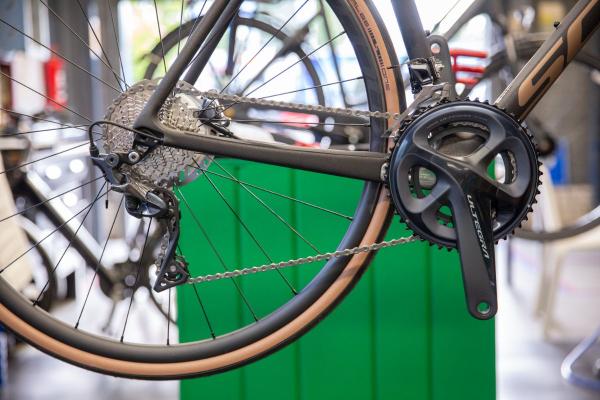
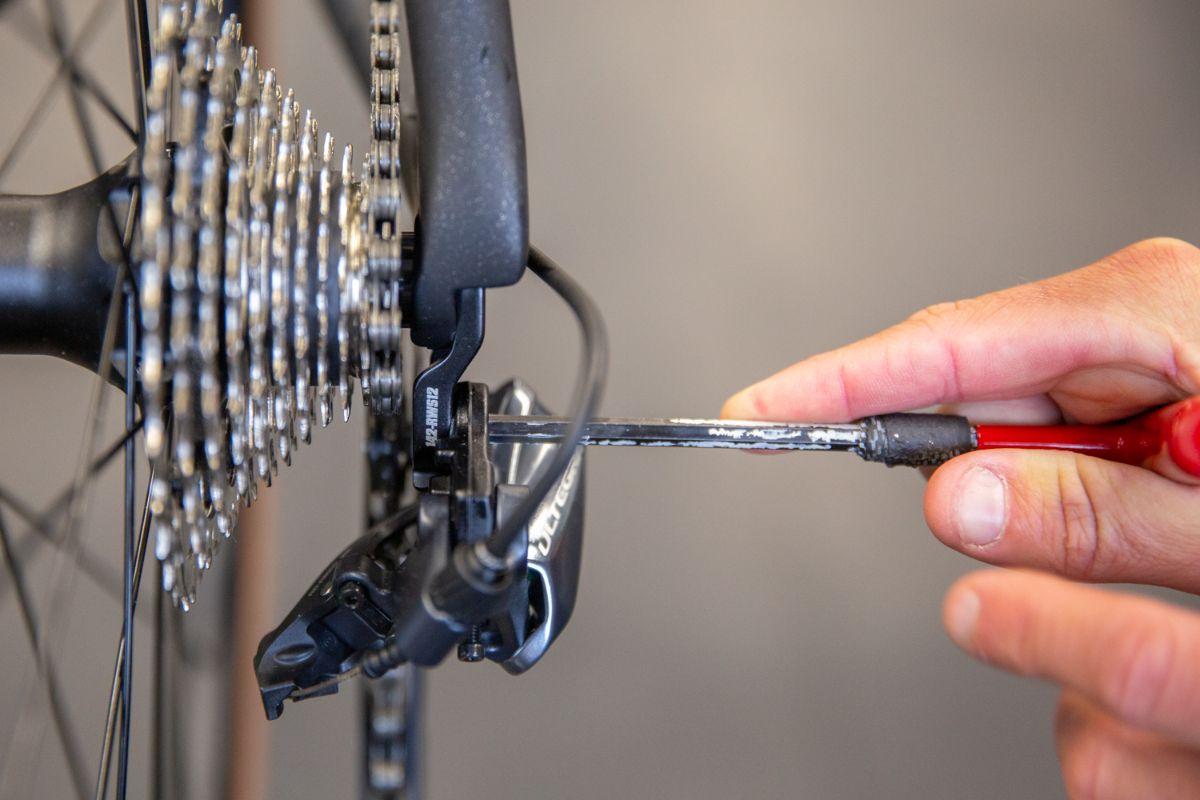
1. Set the limits on the rear derailleur
You adjust the limits by turning the L and H screws of the rear derailleur. You find these here. The left hand screw is the H screw and the right hand screw is the L screw.
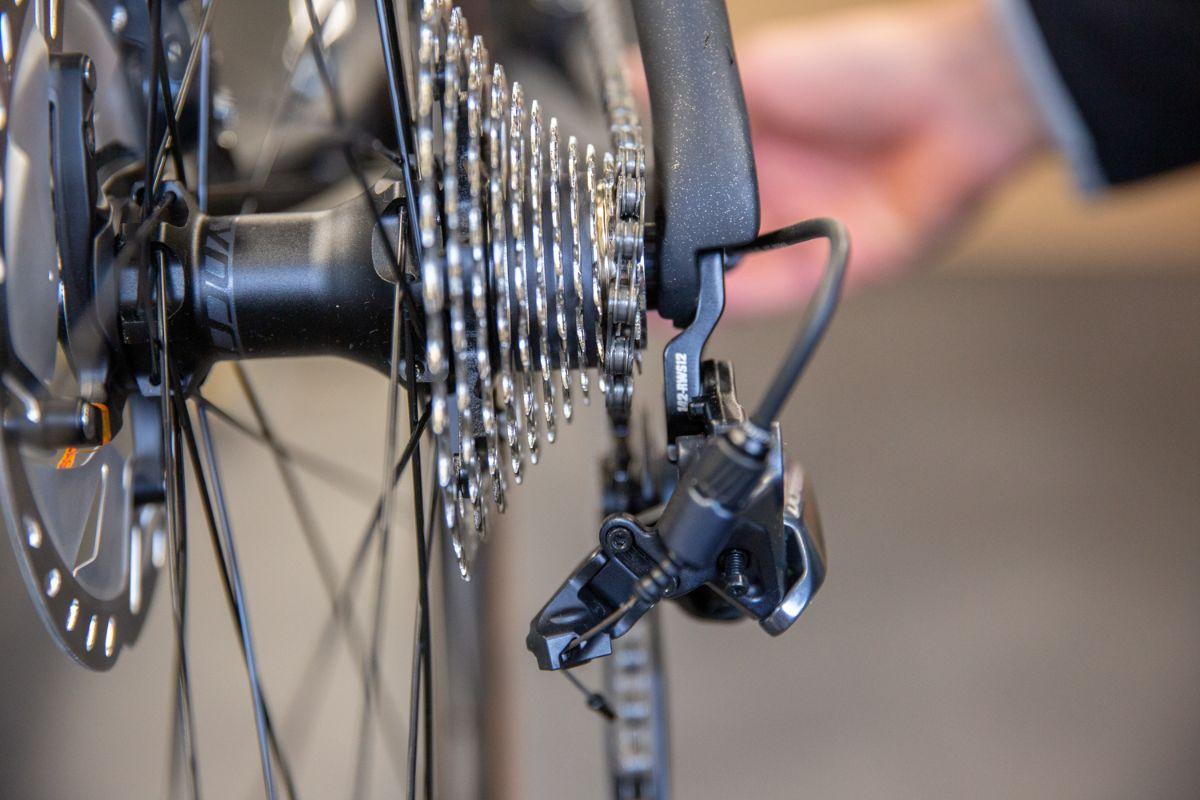
2. Adjust the outer limit
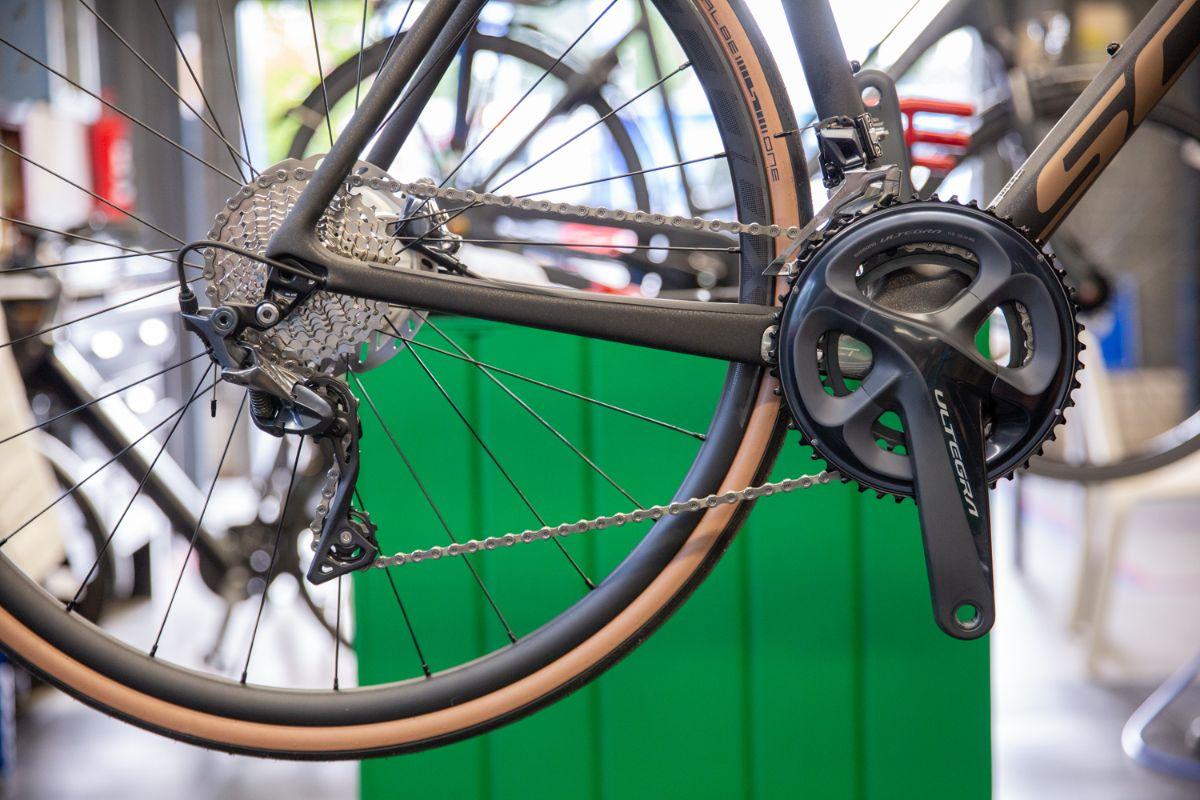
The outer limit is set with the H screw. To do this, first shift onto the biggest chainring at the front. Then shift onto the smallest cog at the back. Just like in the photo above.
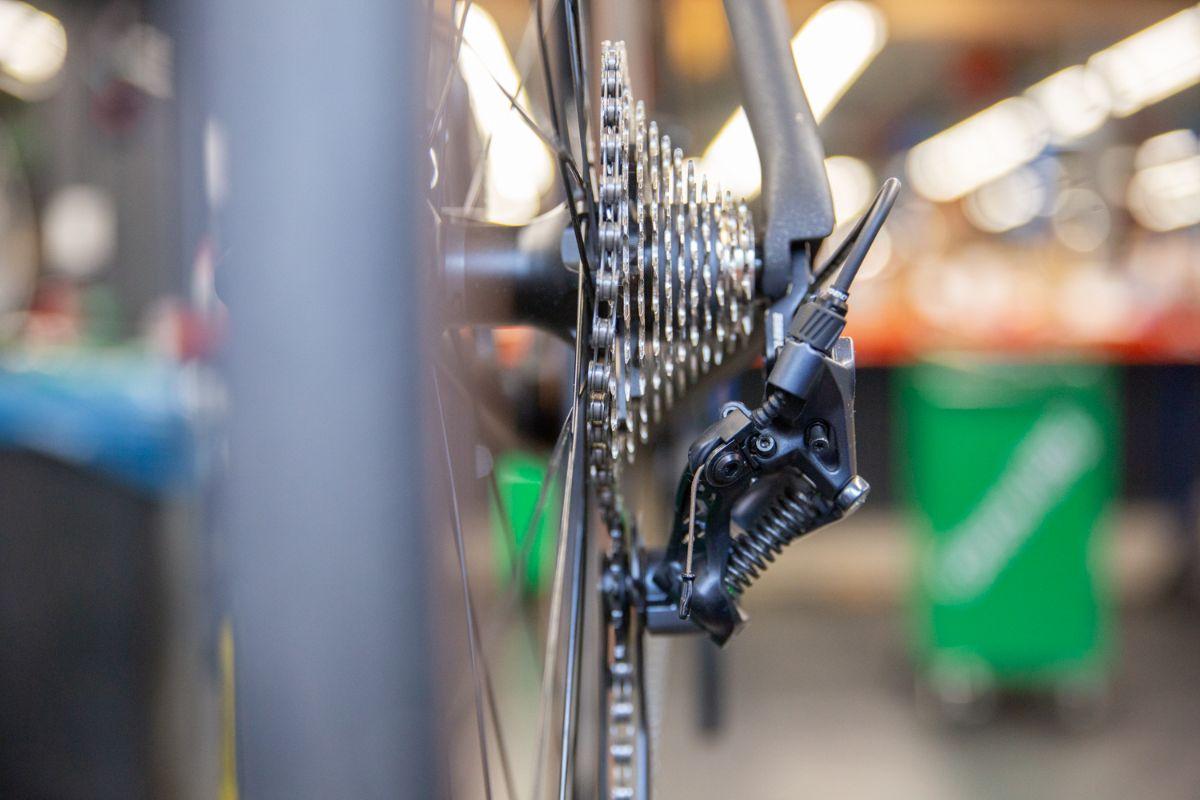
3. Check that the rear derailleur is in the correct position
If the derailleur is too far out, the chain can slip off the smallest cog. If your chain is this way on your smallest cog, then your outer limit is not correctly adjusted.
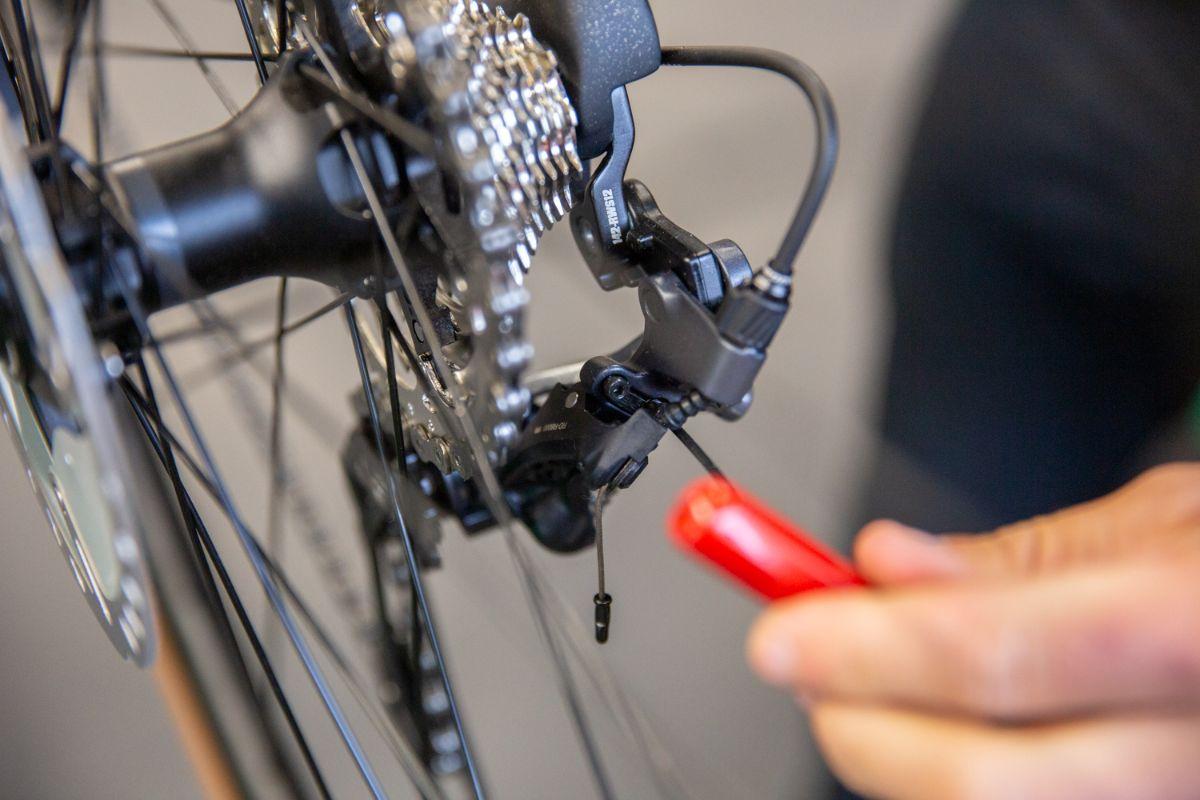
4. Turn the H screw
Again, the H screw is the left hand one of the two screws on the rear derailleur. Turn this screw clockwise.
5. Turn the screw as described until the chain is lying on the smallest cog
In doing this, the chain is now lying correctly on the smallest cog and the outer limit is correctly adjusted.
6. Set the inner limit.
You set the inner limit with the L screw. To do this, first shift onto the smallest chainring on the front. Then shift the derailleur onto the biggest cog on the back. Just like in the photo above.
7. Check that the rear derailleur position is now correct.
If the derailleur is too far out, it can knock against your spokes or the chain could fall between the cog and your spokes. However, if your derailleur is too far in, it will have trouble shifting onto the smallest cog. In the photo above you can see that the inner limit is therefore not adjusted correctly.
8. Turn the L screw.
The L screw on the left hand side. Turn it anti-clockwise.
9. Turn until the chain lies on the largest cog in this way.
Here you see that the chain is lying correctly on the largest cog. The inner limit is therefore correctly adjusted!
A well performed derailleur adjustment does wonders
In this blog you read about how you can adjust your derailleur correctly. Sometimes it can be done just by adjusting the cable tension and in others cases you need to adjust the limits. A correctly performed rear and front derailleur adjustment will be sure to get you back on the road, shifting smoothly. And thanks to that you'll be climbing that challenging Alpen col with somewhat more ease!
Mees Janssen
I am very occupied with everything that has to do with cycling in my spare time. The fact that I get to do this during my job as well makes it all the more special. Since I live in Arnhem, I like to go cycling in my “backyard” (de Posbank) with my road bike or mountain bike. Besides cycling myself, I also love to watch professional cycling on the tv. My television is doing overtime during the summer, because I like to follow all the big cycling tours like the Giro, the Tour de France and the Vuelta. It may come as no surprise that when the Giro d´Italia crossed Arnhem in 2016, I was over the moon!
Related posts

How To Plan a Route Using Komoot? [How-To]
27 March 2023Planning and finding your own cycle routes sounds more complicated than it actually is ...

Do your own bike maintenance work! [Do It Yourself Tips]
7 February 2023Buying a new road, mountain or gravel bike is one thing. Maintaining your bike properly is another ...
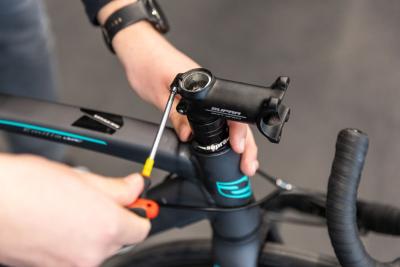
Replace the stem of your road bike in 11 steps [Bike Techcenter]
26 April 2022For road cyclists, being comfortable on your bike is of the utmost importance ...