 Nederland
 België
 Deutschland
 United Kingdom
 Finland
 Ireland
 Luxembourg
 Portugal
 Poland
 Österreich
 France
 España
 Italia
 Sverige
 Danmark


Techcenter: Complete Groupset Assembly
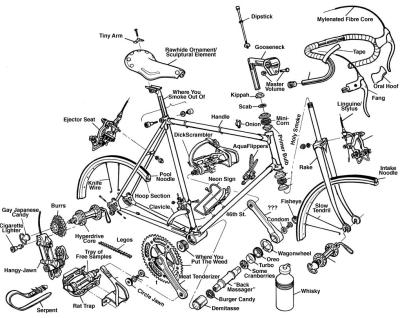
You've just taken delivery of your brand new frame and groupset. What needs to be done now, is for it all to be put together! This blog will explain how to do just that.
FULL GROUPSET ASSEMBLY, CONTENTS
- Fitting the bottom bracket
- Fitting the crankset
- Fitting the shifters
- Fitting the derailleurs and cables
- Fitting the cassette
- Brake installation
- Derailleur set-up & tuning
- Wrapping the handlebar tape
REQUIRED TOOLS
- Full set of Allen keys
- Phillips Head screwdriver
- Cable cutters
- Internal cable installation set (optional)
- Chain rivet extractor
- Chain whip
- Cassette remover
- Electrical tape
- Scissors
- Handlebar tape
- Assembly paste
- Chain lube
- Hammer
1. FITTING THE BOTTOM BRACKET
First thing to do is to fit the bottom bracket. This serves as the housing for your crankset later.When you purchase your groupset, please make sure you also get the correct bottom bracket, as this varies between framesets. Use this blog to identify which one you’ll need. The installation varies between the different types of bottom brackets.
2. FITTING THE CRANKSET
The bottom bracket has been installed, now it’s time to fit the crank. You’ll find the different procedures for installing the crank, split per brand, below:Shimano
- Mount the crank arm fitted with chainrings on the same side as you’re going to install the front derailleur on.
- The other crank arm is rotated 180 degrees in relation to the now fitted crank arm.
- Install this arm using some assembly paste.
- Tighten the plastic crank bolt.
- Now tighten the hex bolts at the top of the left crank arm. Instead of fully tightening one first, and then the other, progressively tighten the bolts simultaneously, alternating between the bolts every half turn. This is done to prevent damage to the crank.
Sram
Sram uses a very similar procedure. The only difference is in the final step: rather than using a plastic crank bolt, Sram utilises an aluminium hex bolt.
- Mount the crank arm equipped with chainrings on the same side as you’re going to install the front derailleur on.
- The other crank arm is rotated 180 degrees in relation to the now fitted crank arm.
- Install this arm using some assembly paste.
- Tighten the aluminium bolt to the recommended torque specification.
Please note the procedure for BB30 can be slightly different.
https://youtu.be/d7EqAZo-HTI?t=1m30s
Campagnolo
The cranks by Campagnolo come in two different versions, notably “Power Torque” and “Ultra Torque.” The installation process for Power Torque is broadly similar to that of cranks made by Sram and Shimano. Ultra Torque differs slightly however.
ULTRA TORQUE
- Check whether the bearing retainer clip is locked to the bearing cup. If it is, remove this first.
- Fit the drive-side crank arm by sliding the spindle through the bearing cups.
- Once in place, reinstall the retainer clip to the bearing cup.
- Fit the non-drive side crank opposite to the drive side crank arm (rotated through 180 degrees). Don’t forget to install the spring.
- Tighten the crank bolt, working from the drive-side of the crank. Note that with Super Record, the bolt needs to be tightened anti-clockwise as this uses a left-handed thread!
https://youtu.be/FT4qzevaOWo?t=5m11s
POWER TORQUE
- Fit the drive-side crank arm by sliding the spindle through the bearing cups.
- Fit the bearing, spring and seal in the left bearing cup.
- Fit the non-drive side crank opposite to the drive side crank arm (rotated through 180 degrees). Don’t forget to install the spring.
- Tighten the aluminium bolt to the recommended torque specification.
https://youtu.be/L1_3smRyk-w?t=1m2s
3. FITTING THE SHIFTERS
Fit the shifters on the handlebars of your bike. The ergonomics of your shifters might be slightly different from your old ones, so we’d recommend you test your shifters and position first before wrapping the bar tape.
4. FITTING THE DERAILLEURS AND CABLES
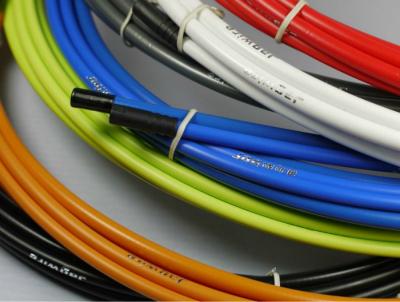
Install the front- and rear derailleur by attaching them to the mounting points on your frameset. Once this is done, move on to installing the cables. A comprehensive how-to on changing and fitting cables can be found here.
5. FITTING THE CASSETTE
A new groupset comes with a new cassette and chain, which makes sense if you’re upgrading from a 10 to an 11-speed groupset. However, when upgrading from, say 105 11-speed to an Ultegra 11-speed, it pays to change the cassette and chain with the rest of the groupset. This prevents excessive wear on the new groupset and will ensure maximum shifting performance. This blog explains how to install a cassette, while this blog explains more about fitting the chain.
6. BRAKE INSTALLATION
Not something one should forget: brakes. Typical road brakes are often mounted to the frame and front fork using a 5mm hex bolt. There are some different mounting systems, such as the Direct-Mount brakes on Trek bikes, or the aerodynamic set-up on a Giant Propel. Carefully read the manual of your brakes to prevent accidents or damage. Mountainbike brakes usually use the same 5 mm hex bolt system as their road-going counterparts.
7. DERAILLEUR SET-UP & TUNING
Every component is now installed, and you’re now ready to start fine tuning the set-up. Dialling in the front- and rear derailleur is a job which requires some patience, but pays dividend when done properly. This blog offers step-by-step instructions to ensure the operation of your derailleurs is accurate and silky smooth.All set? Take the bike for a short spin to try everything out in the real world. Get a feel for your shifter position, and make adjustments where needed.
8. WRAPPING THE HANDLEBAR TAPE
The final step is to wrap your handlebars, so all cables are nicely tucked away underneath. If you ride a mountainbike, this last step is slightly easier: fit the grips and hit the trails!Check everything again after the installation is complete, and monitor the operation of your new groupset during the first few rides. Bolts can shake loose, and cables can stretch a little, so a tune up might be required after the first few miles. If everything checks out: enjoy your new gear! If you have any questions or comments, please do feel free to contact us and we'll do our best to help you out!
Translated by: Bart van Es
Dirk Jan van Straaten
De weg is waar mijn passie ligt. Al enige jaren actief als wielrenner zowel competitief als rustig toeren. De weg biedt eindeloze mogelijkheden of het nu gaat om stevig klimmen of een vlak polderlandschap je vindt het er allemaal.
Related posts

How-To Convert 26" to 27,5" / 650b MTB wheel size
5 December 2017Want to convert your 26 inch MTB to a 27.6 inch? That's a job you can easily do yourself ...

How-To: Changing your Cassette
11 May 2016We've explained how to replace a Shimano/Sram/KMC and Campagnolo chain in previous posts ...
How-To: Changing your Cables
17 April 2015If your groupset still feels “off” after having tuned your derailleurs and brakes, you'll probably need to replace your ...