 Nederland
 België
 Deutschland
 United Kingdom
 Finland
 Ireland
 Luxembourg
 Portugal
 Poland
 Österreich
 France
 España
 Italia
 Sverige
 Danmark


Replacing the disc brake rotors on your road bike or MTB [How-to]
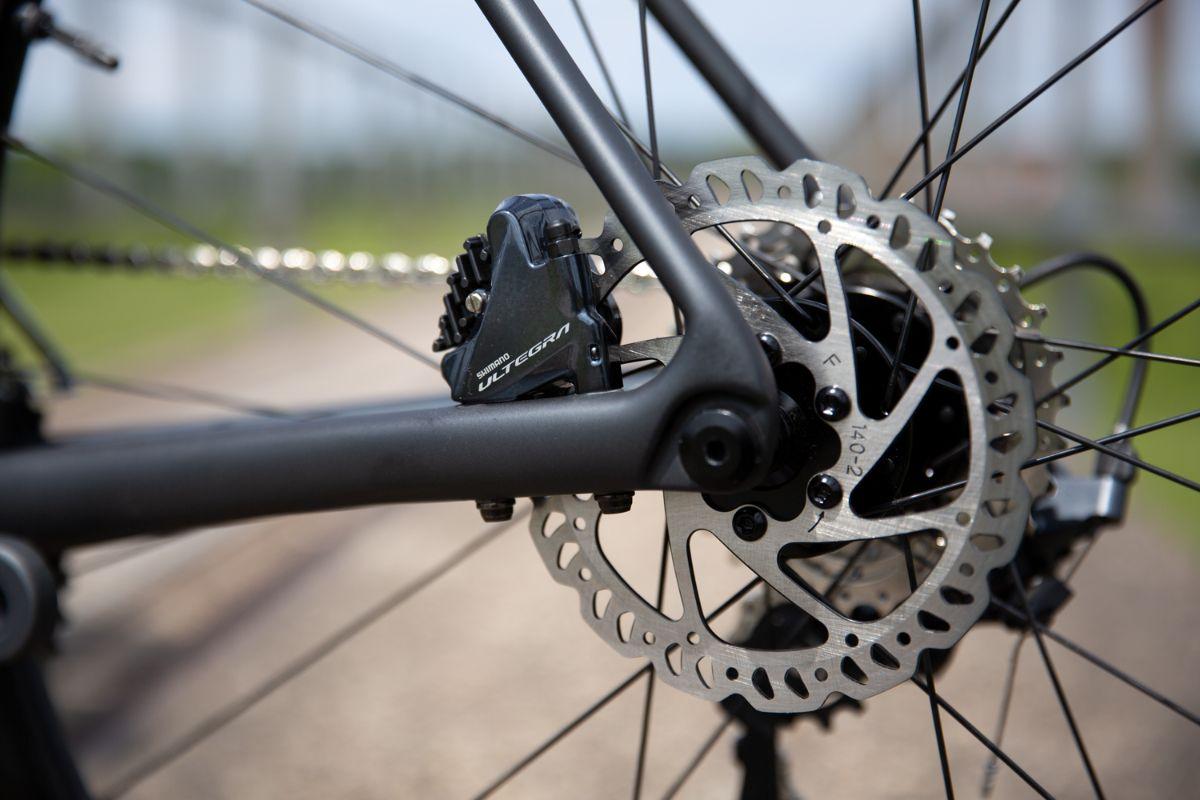
Reliable brakes are an essential part of your road bike or MTB. Disc brakes are becoming more and more popular. They are easy to recognise by the round metal discs in the centre of the brack and front wheel called disc brake rotors. For your safety, and the safety of others, it is important to replace your disc brake rotors when they are worn. This blog explains how you can do that!
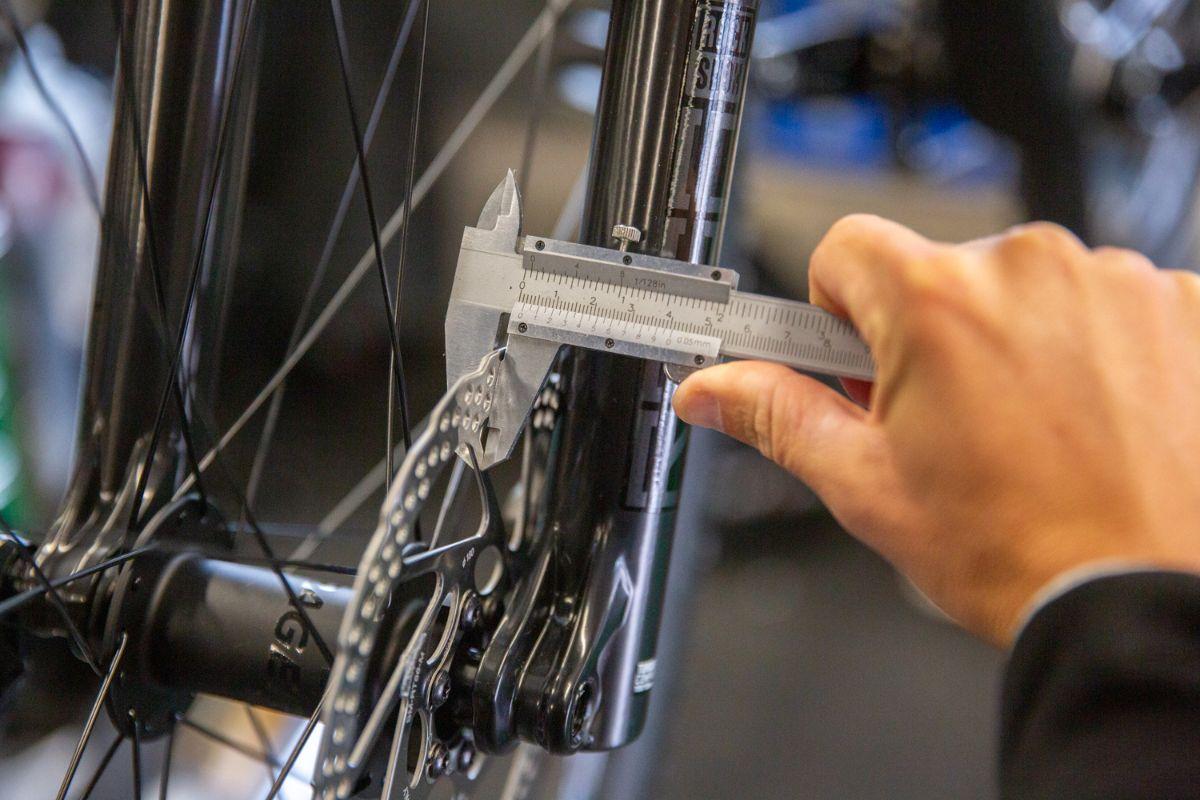
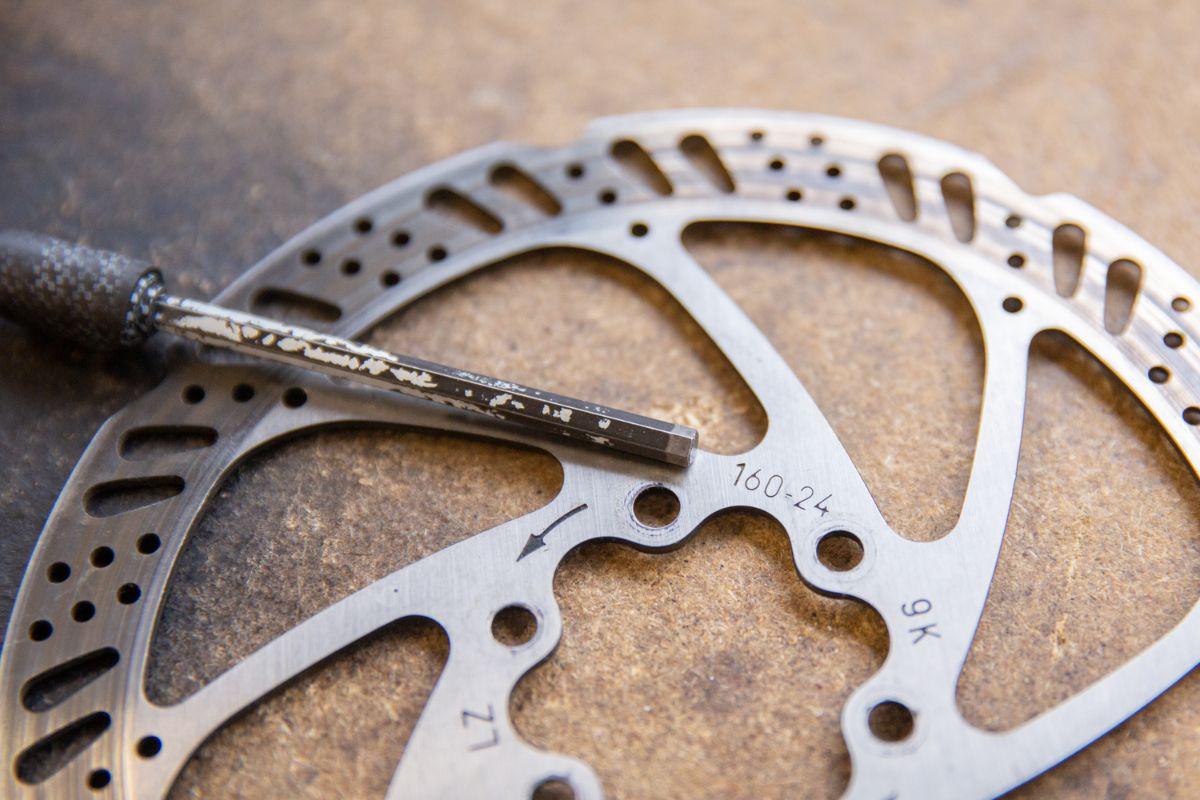
Your brake disc needs to be replaced when it is worn out. To determine whether your brake disc is worn, you need to measure the thickness of the disc. You measure the thickness of your brake disc with calipers. Compare a part of the brake disc that has been used for braking and a part of the brake disc that has not been subject to wear. If there is a difference of more than 0.20 millimeters, your brake disc needs to be replaced.
Some disc brake rotors have a handy indication on the disc of the minimum thickness of your brake disc. This differs per manufacturer. So when the thickness of your brake disc falls below this minimum number of millimeters, the disc needs to be replaced.
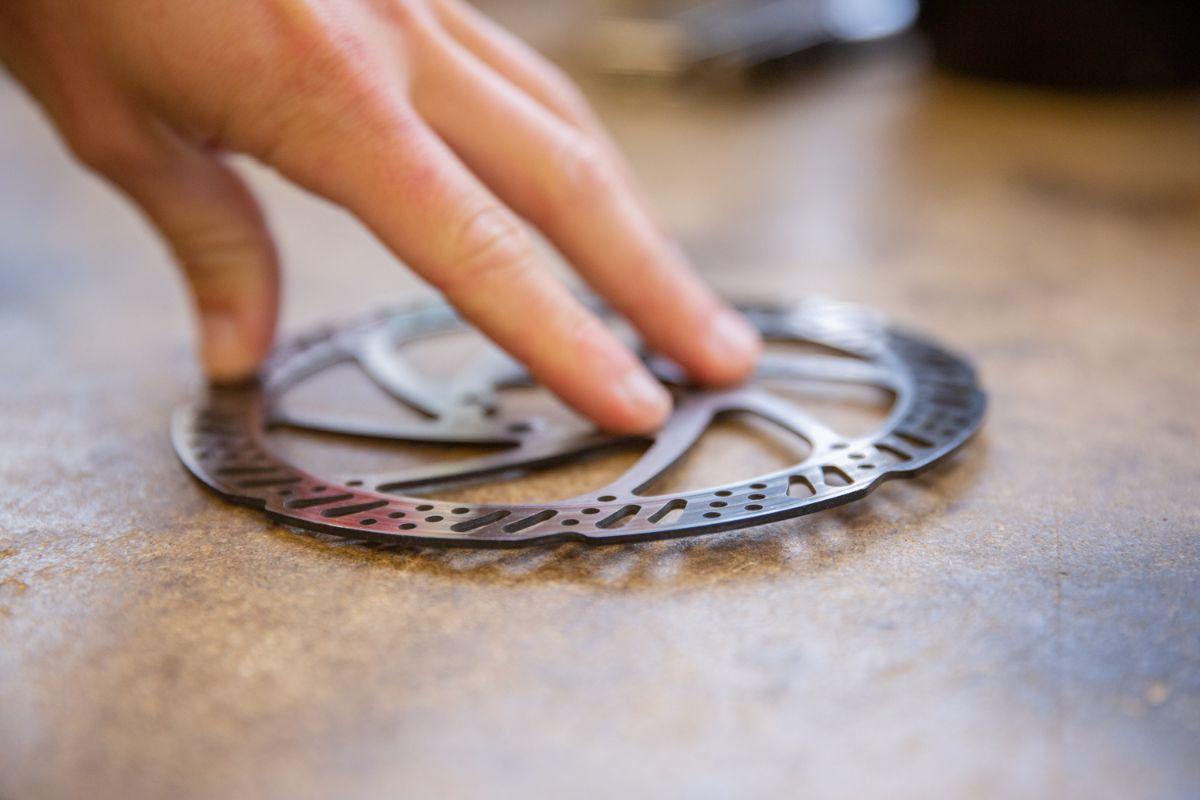
Your brake disc does not only need to be replaced when the surface is worn out. It is also possible that your disc is bent. You can easily test this by placing the brake disc on a table and pressing your finger on one side of the disc. If this causes the other side to come up, your brake disc needs to be replaced.
Disc brake rotors
If you find out that you need to replace your brake disc, it is important that you order a correct new brake disc. Brake discs come in different sizes, and often one is larger than the other. The size must correspond to the original brake disc.
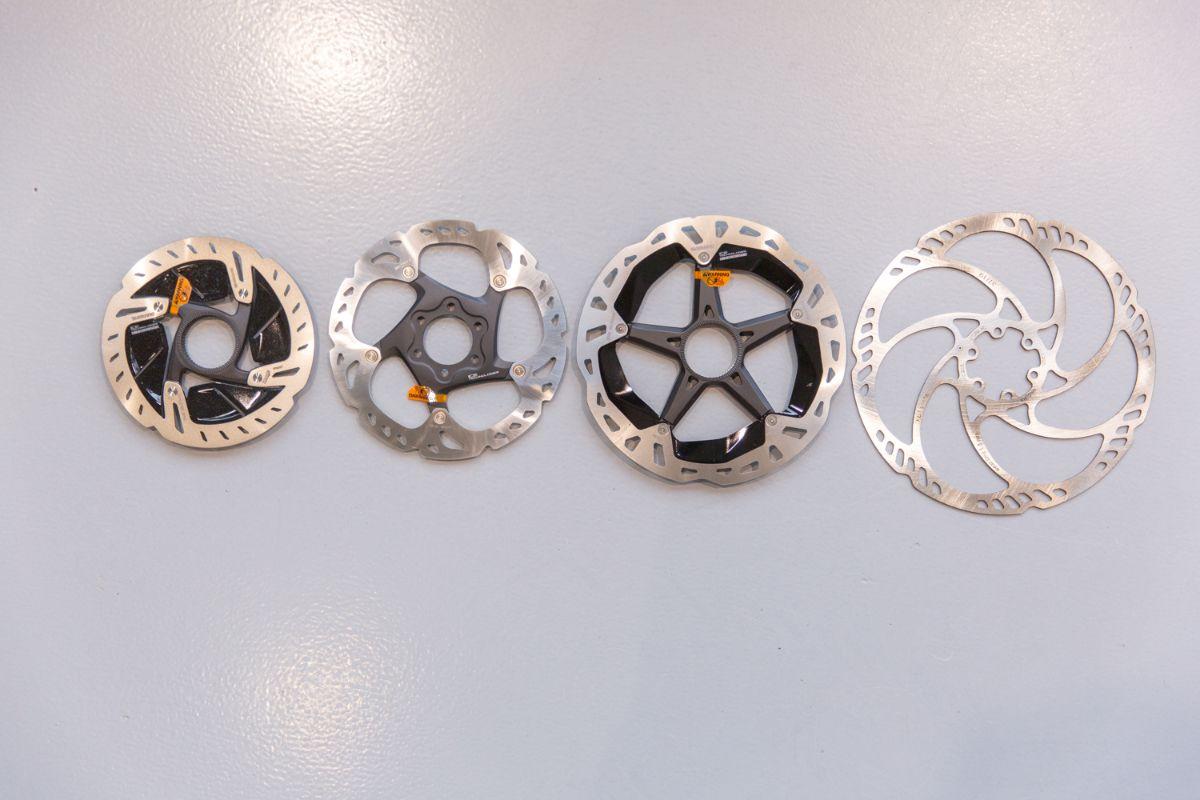
The size of your disc brake rotors is often already indicated on the disc itself. The diameter of the brake disc is then stated on the disc. The diameter of a brake disc is often between 140 and 220 millimeters. If the diameter is not clearly indicated, then you have no choice but to measure the diameter of your disc manually.
Types of disc brake rotors pads
Your racing bike or mountain bike comes to a stop due to a collaboration between your brake disc and your disc brake pads that are inside the brake caliper. Just as there are different brake discs, there are also different disc brake pads.
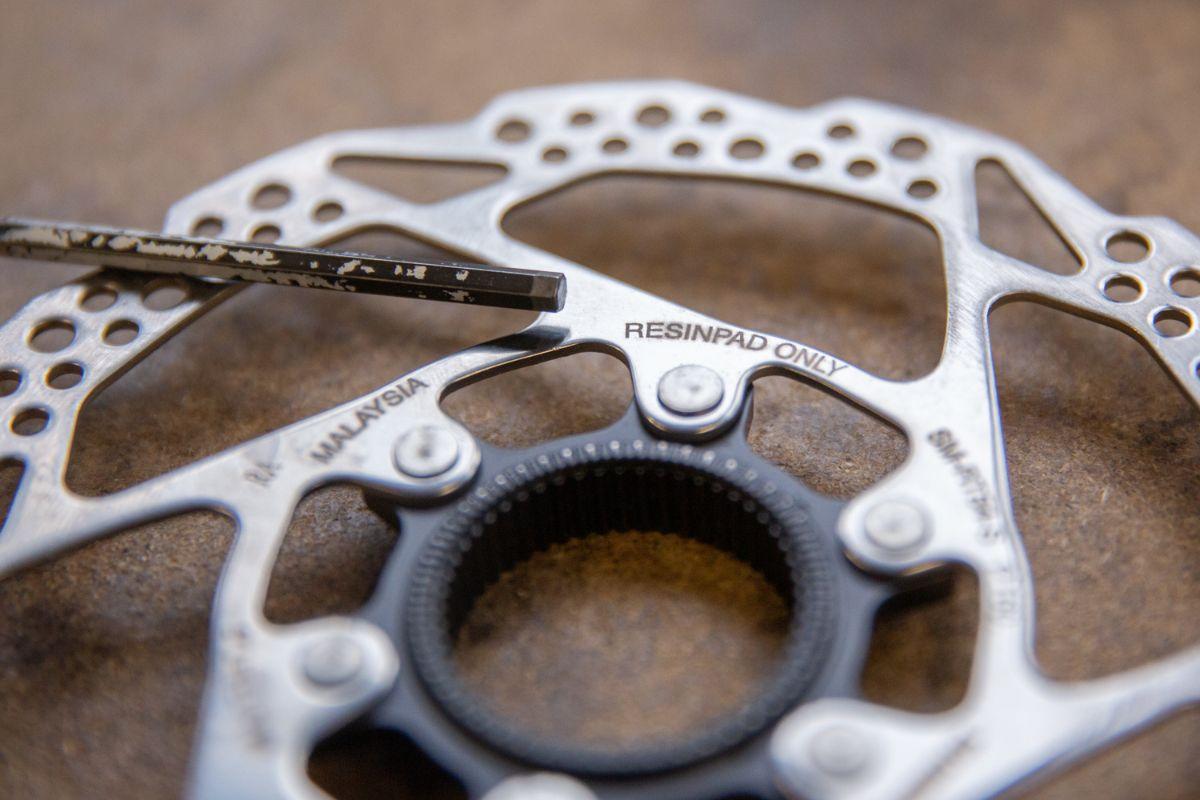
The difference with the disc brake pads is in the material which the pads are made from. In short, a distinction can be made between hard and soft brake blocks. Certain brake discs can only be used with soft (resin) brake pads. This is usually clearly marked on the brake disc.
6 bolt or centerlock rotor
Now you have a clear overview of which type of disc brake rotors you should order. There is one more very important distinction to make between different brake discs. This is how the brake disc is attached to the wheel of your road bike or mountain bike.
Your brake disc is attached with a 6 bolt connection or a centrelock connection. A brake disc with a 6 bolt connection is attached using, well, six bolts. A centerlock brake disc is attached with a washer in the middle. You can read in this blog how best to replace your brake disc for each connection:
Mounting a 6 bolt disc
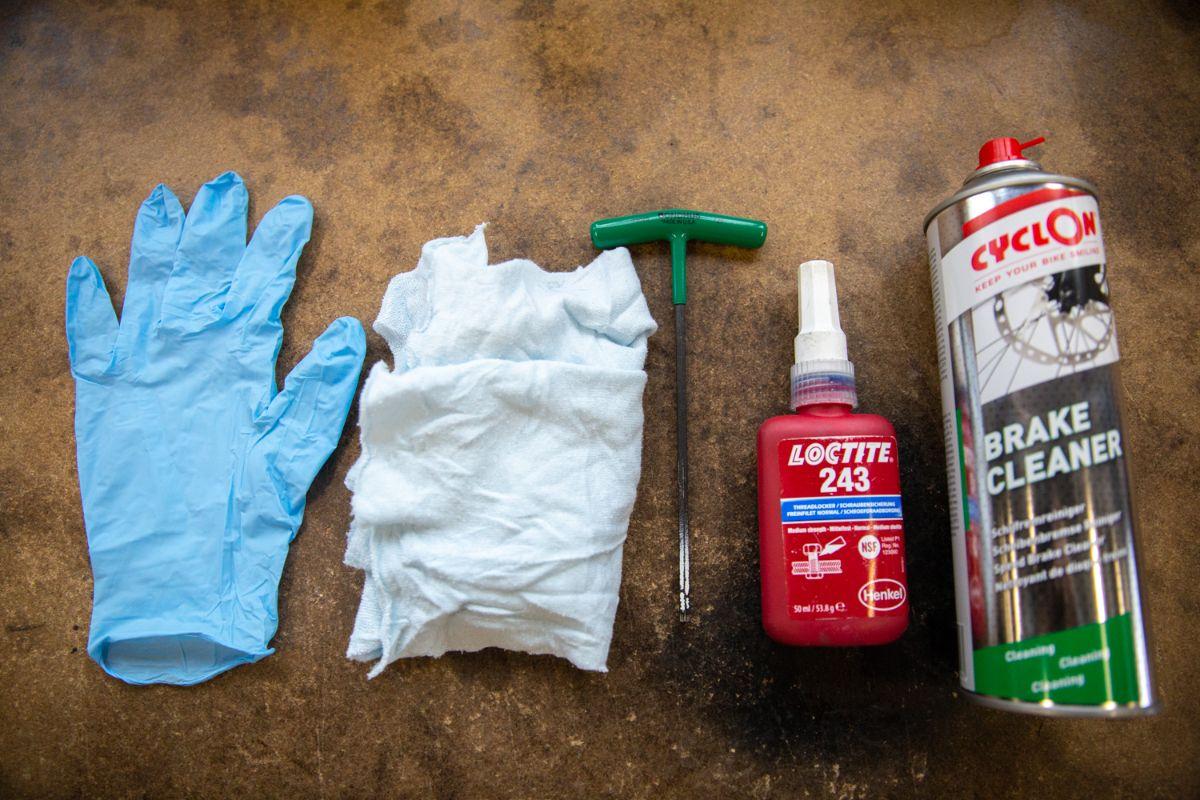
To replace the 6 bolt brake disc of your road bike or mountain bike, you need the following tools:
- An allen key or Torx screwdriver
- Loctite
- A clean workshop rag
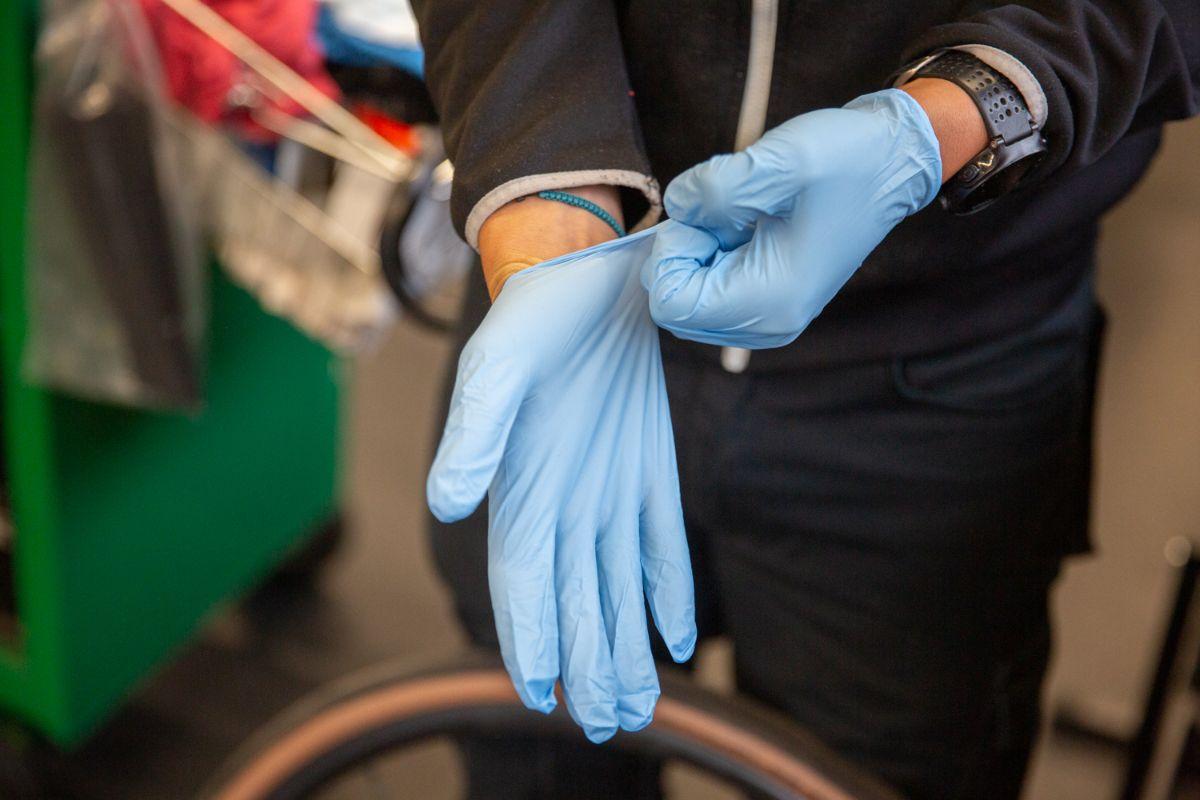
- Plastic gloves
- Brake cleaner
How to replace your disc brake rotors (6 bolt)
-
Remove the wheel
Remove the wheel on which you are going to replace the brake disc.
-
Remove the bolts.
Remove the six bolts on the brake disc with the appropriate wrench.
-
Remove the brake disc from the wheel.
Remove the six bolts on the brake disc with the appropriate wrench.
-
Apply loctite
If there is no loctite on the bolts, apply it in the holes where the bolts should go. Don't use too much! Then wipe the holes with a cloth. Note: do not apply loctite to the bolts themselves!
-
Wipe with a cloth
Then wipe the holes with a cloth.
-
Always wear gloves when working with a new brake disc
Now take the new brake disc. It is important that the surface of the brake disc remains free of dirt that comes off your hands. So put on plastic gloves for this.
-
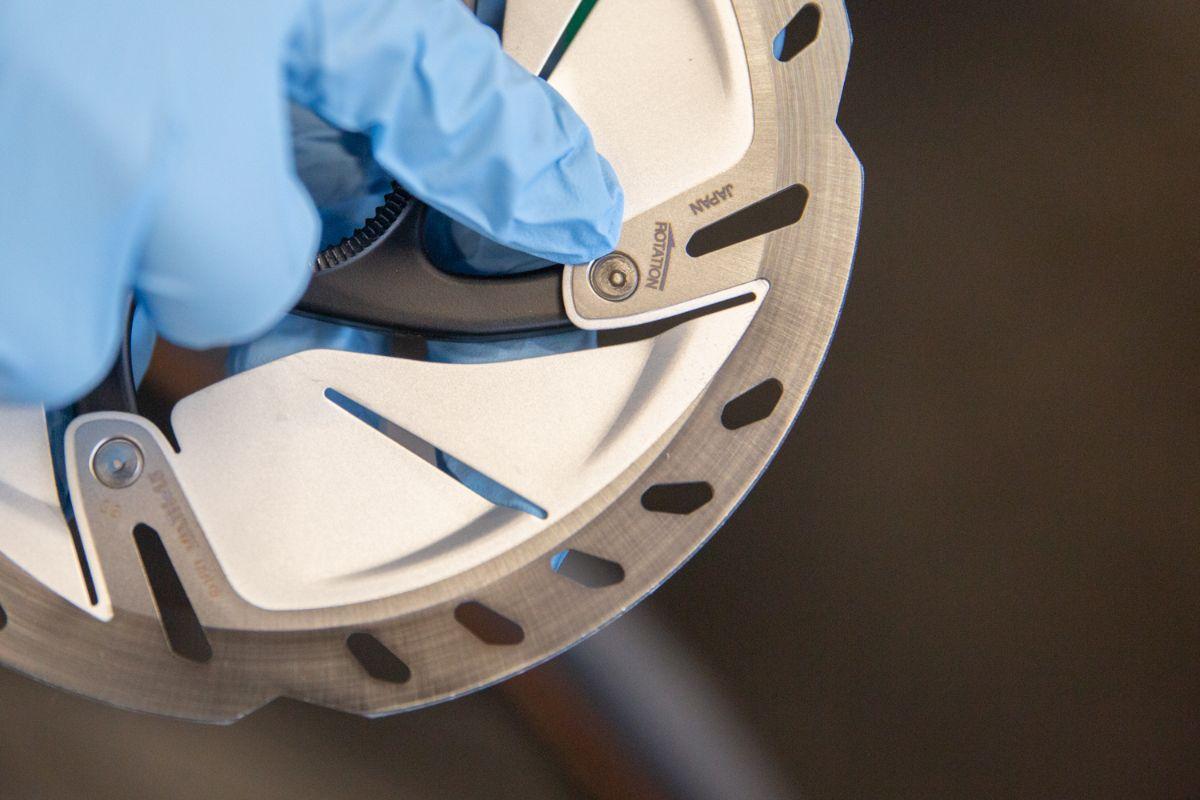
Be careful how you insert the disc!
Discs are made to rotate in a certain direction. This is often indicated on the brake disc itself. Make sure that the arrow is in the direction the wheel turns when you cycle forward.
-
Place the new brake disc on the wheel
Place the new brake disc on the wheel (with gloves of course!)
-
Turn the bolts in a bit
Turn the bolts in partially, not all the way.
-
Now tighten the bolts further. Tighten them so that they are close to the surface of the disc, but not touching the disc
Then turn the brake disc clockwise so that the disc rests against the bolts. You do this to prevent the disc from moving when you start cycling.
-
Now fully tighten the bolts while holding the brake disc in the position shown in the previous step
-
Wipe the new brake disc with a clean cloth
Finally, use a clean cloth with some brake cleaner on it to wipe the disc so that there is no dirt on it. Now you're done and you can safely hit the road again!


Mounting centrelock discs
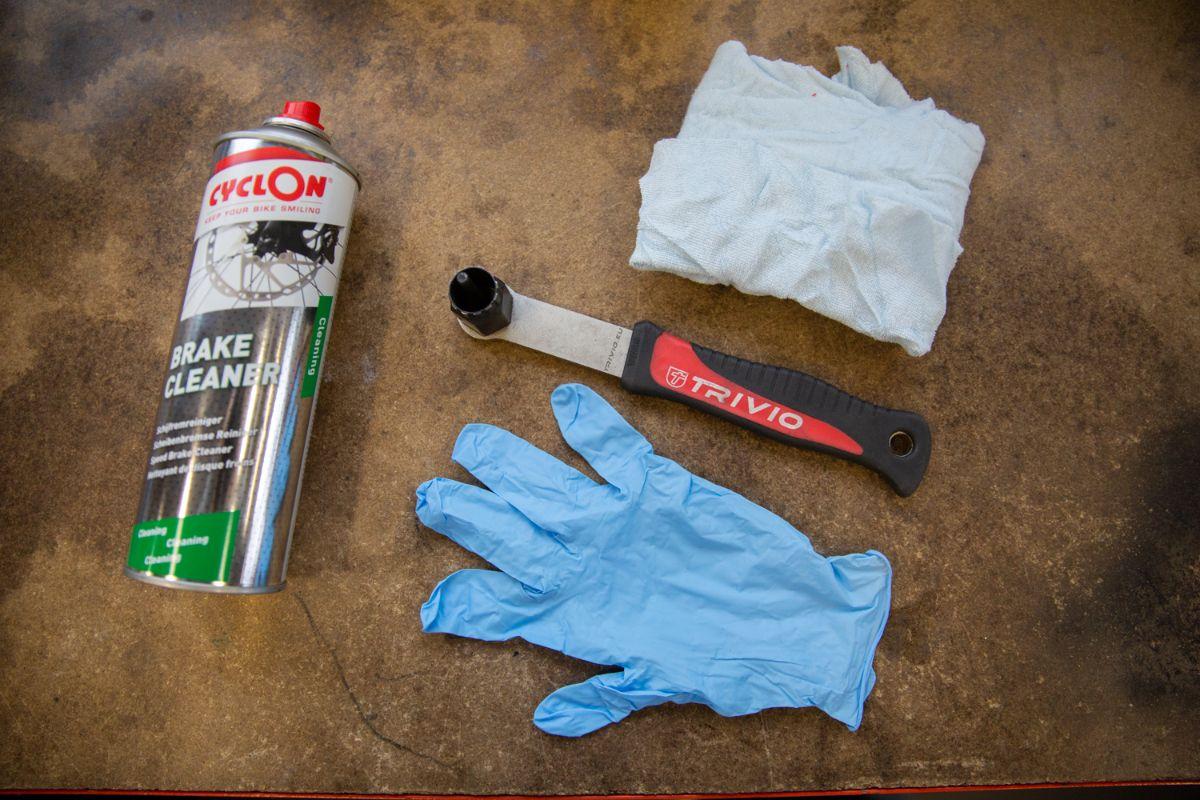
To replace brake discs with centerlock connection, you need the following tools:
- A cassette removal tool
- Torque wrench
- A clean workshop rag
- Plastic gloves
- Brake cleaner
How to replace your disc brake rotors (centerlock)
1. Loosen the washer with a cassette removal tool.
Place a cassette tool on the washer, turn it counterclockwise to loosen the washer.

2. Unscrew the washer.
Gently unscrew the washer with your hands.
3. Remove the brake disc.
Remove the old brake disc from the wheel.
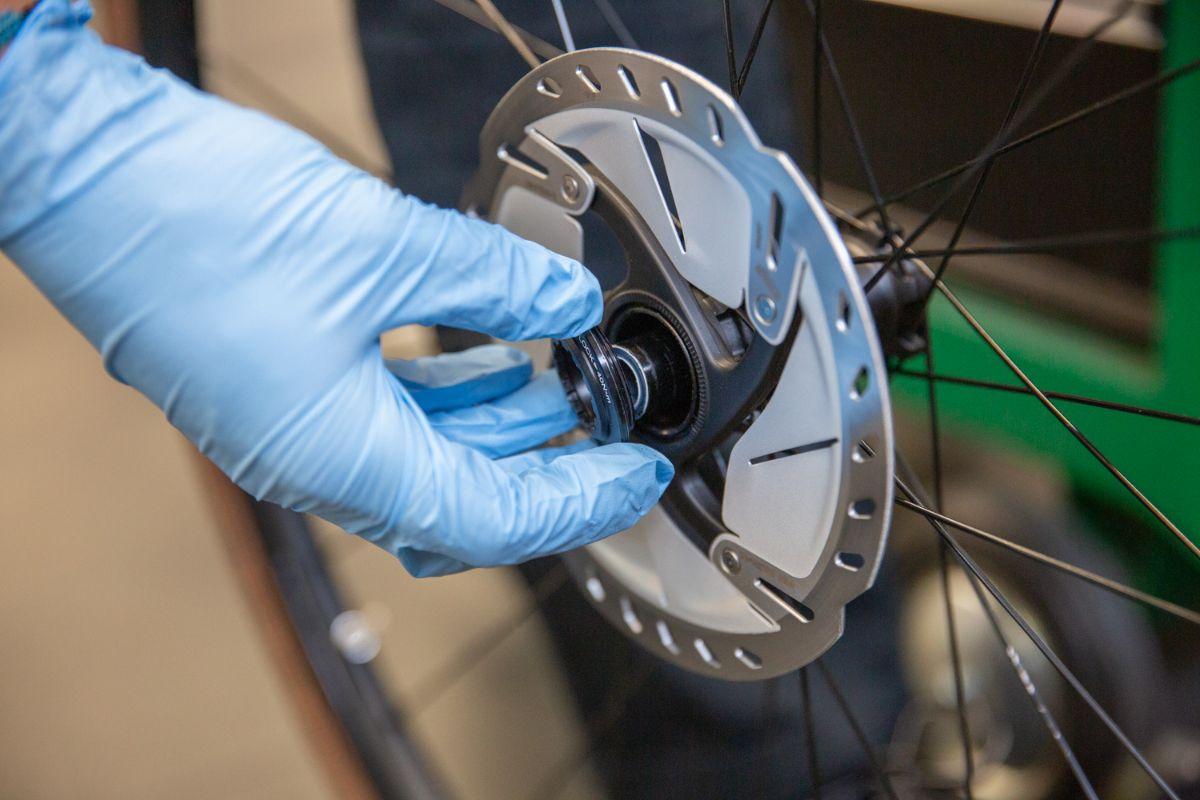
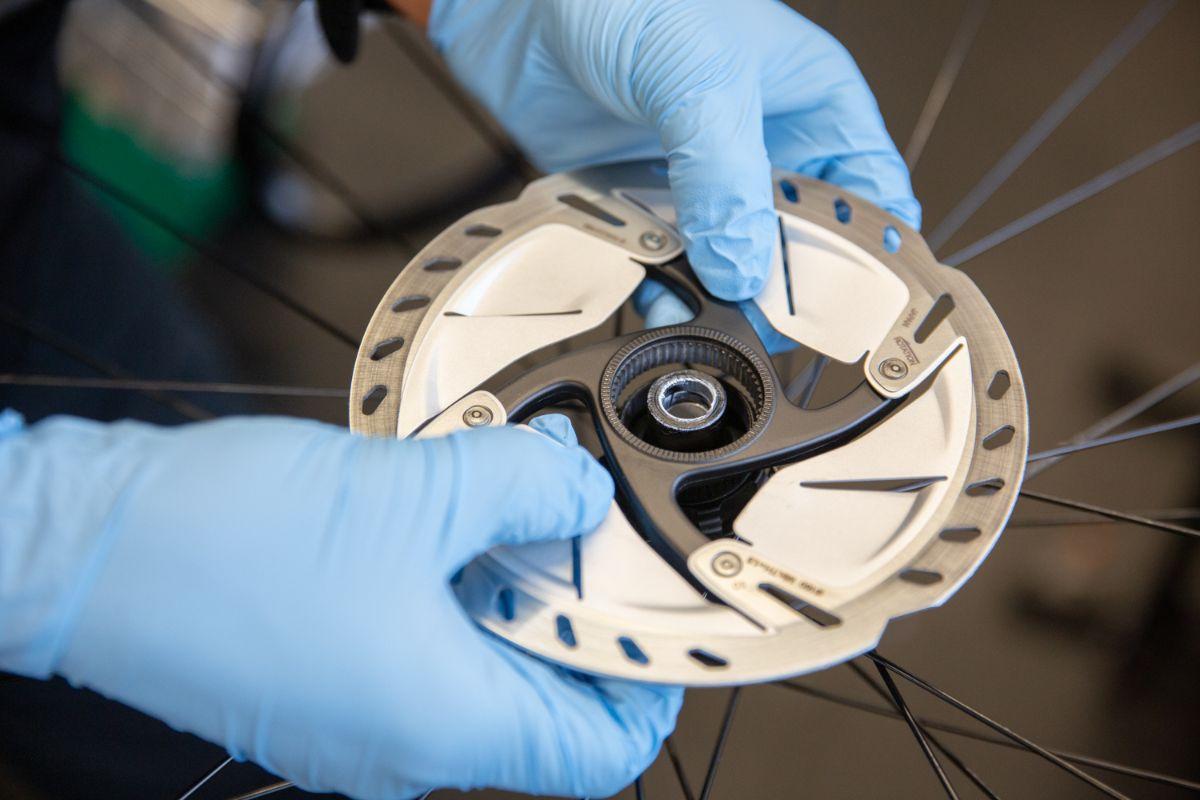
4. Use gloves when touching the new brake disc.
It is important that the surface of the new brake disc remains free of dirt that comes off your hands. So put on plastic gloves for this.
5. Place the new disc in the correct direction on the wheel.
Discs are made to rotate in a certain direction. This is often indicated on the brake disc itself. Make sure that the arrow is in the direction the wheel turns when you cycle forward.
6. Insert the new disc.
Carefully place the new disc on the hub in the wheel.
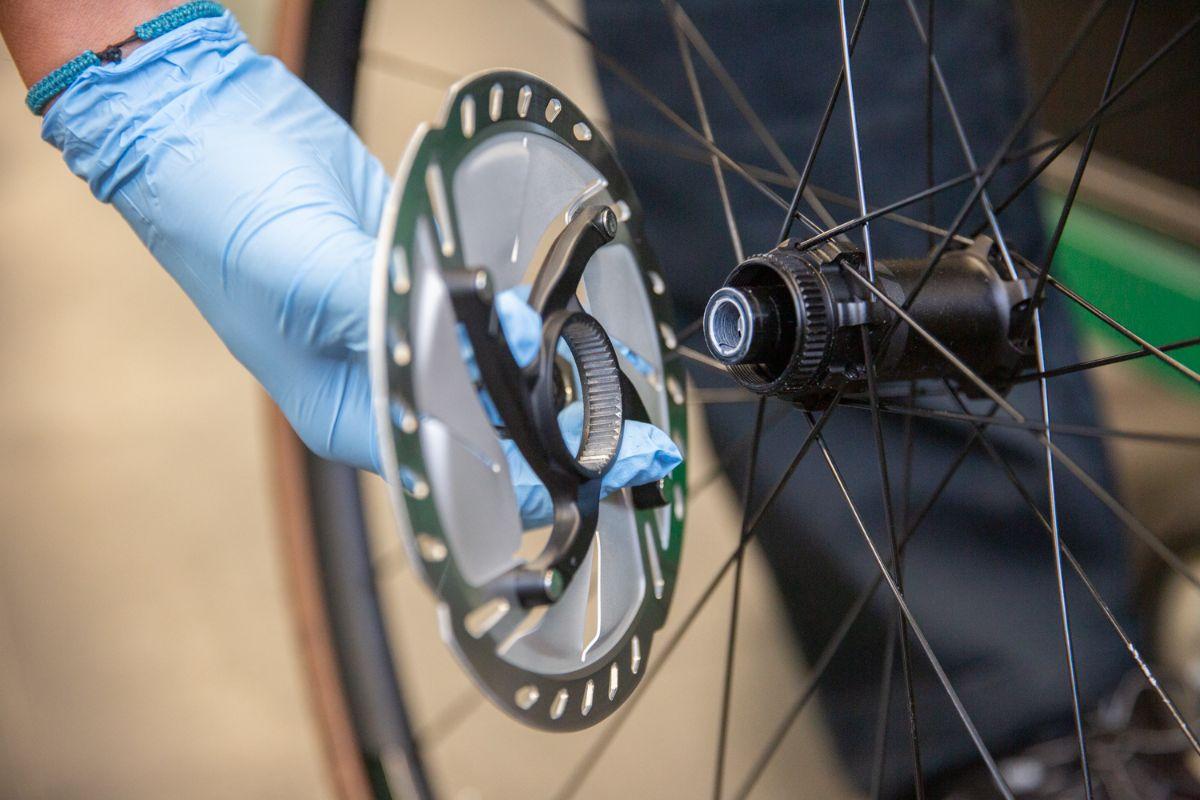
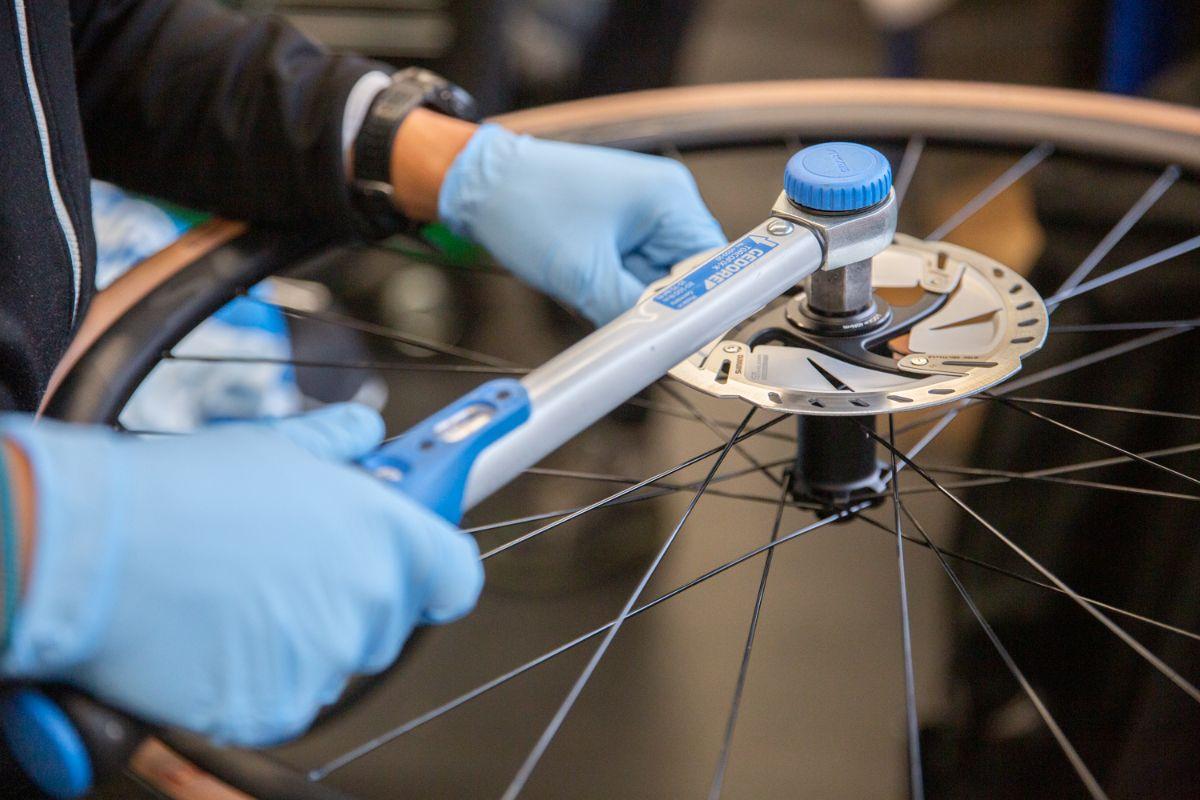
7. Screw the washer back on.
Carefully retighten the washer by hand.

8. Fully tighten the new brake disc.
Set the torque wrench to 40 newton meters and then fully tighten the washer clockwise again.
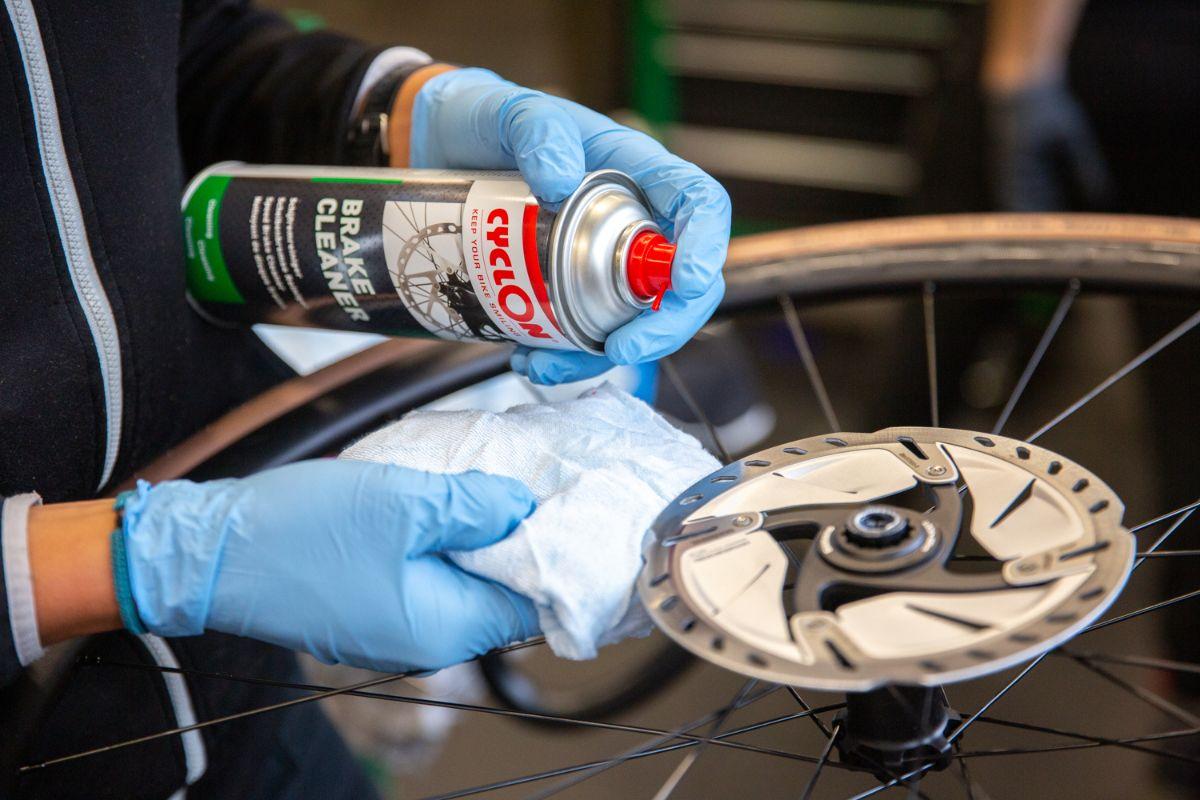
9. Clean the new brake disc well.
Finally, use a clean cloth with some brake cleaner on it and clean the disc so that there is no dirt on it. After this, all you have to do is put the wheel back and you're ready to roll again!
Replace your brakes pads at the same time
It's a good idea to also replace your brake pads while replacing your disc brake rotors. These, of course, also wear out and therefore need to be replaced. In this blog you can read more about how to determine what type of brake pads you need, as well as how to replace them.
Mees Janssen
I am very occupied with everything that has to do with cycling in my spare time. The fact that I get to do this during my job as well makes it all the more special. Since I live in Arnhem, I like to go cycling in my “backyard” (de Posbank) with my road bike or mountain bike. Besides cycling myself, I also love to watch professional cycling on the tv. My television is doing overtime during the summer, because I like to follow all the big cycling tours like the Giro, the Tour de France and the Vuelta. It may come as no surprise that when the Giro d´Italia crossed Arnhem in 2016, I was over the moon!