 Nederland
 België
 Deutschland
 United Kingdom
 Finland
 Ireland
 Luxembourg
 Portugal
 Poland
 Österreich
 France
 España
 Italia
 Sverige
 Danmark


Mount a new disc brake set on your MTB in 10 steps [How-To]
Mounting a new disc brake set on your mountain bike seems a lot of work. But did you know that fitting a new disc brake set is a job you can actually do yourself? We upgraded Bram’s Enduro bicycle with the Magura MT Trail Sport brake set to show you how to mount a new brake disc set yourself.
I chose the Magura MT Trail Sport brake set, because it’s a perfect upgrade to gain braking power in steep downhill runs. Thanks to Magura MT5’s 4 front pistons and Magura MT4’s 2 rear pistons, you are ensured of perfect modulation. Even for the steepest of descents in the Alps.
Hydraulic powerhouse
For many mountain bikers, Magura is well-known for their hydraulic brakes. I have been familiar with Magura ever since I rode my first mountain bike with HS33 hydraulic rim brakes.

And of course, progress doesn’t stop there. The MT Trail Sport is provided with Magura’s lightweight Carbotecture: the second strongest ‘plastic’ in the world. This material is so good that it’s even used in BMW motorcycles.
So it’s a rugged hydraulic MTB brake set with a reasonable weight. But enough about the disc brake set, it’s time to mount the set onto a mountain bike. For the most part, the assembly instructions also apply to the assembly of other hydraulic MTB disc brakes.
A new disc brake set on your MTB in 10 steps
-
Disassemble your old brake set
In our case, the shifters will be disassembled as well since it was attached to the brake with the Shimano I-spec. Luckily, Magura has the same assembly for your shifters: a SRAM and Shimano shift mix. So the shifters can be mounted again later.
-
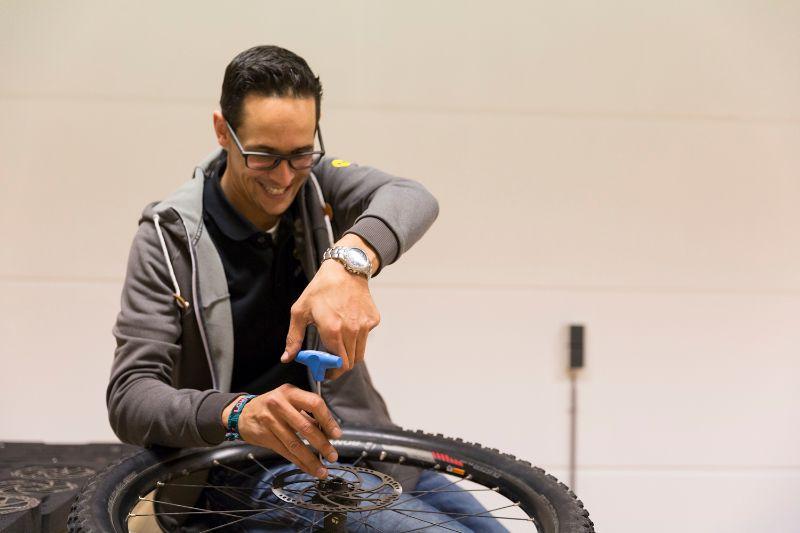
Take the wheels out of the frame to mount the disc brake rotors
The first step is to mount the disc brake rotors. To be able to do so, you need to remove the wheels from your frame first. Since we also use the bike in bike parks, we opt for a 203 mm front brake disc and a 180 mm rear brake disc. You don’t always need new disc brake rotors if you mount a new set of hydraulic brakes. But the Magura disc brake rotors are slightly wider than the old disc brake rotors.
-
Mount the new caliper and brake lever
For the installation of the brake caliper it is best to assemble the wheelset first. If necessary, make sure you have the right adapter for the size of your brake disc rotor. First mount the caliper, and then you mount the brake lever on the handlebar. We only shorten the brake hose in step 4. You first need to know how much of the cable you actually have left. And obviously, you don’t want to accidentally shorten it too much. Also, do not tighten your caliper too much. It must still be able to move in order to centre it in step 8.
-
Shortening the hydraulic brake hose
By default, brake hoses are too long. So in order to make them run along your frame without long loops at the handlebar, you have to shorten them. It is very important that you always do this with an hydraulic brake hose cutter. Only with this useful bike tool you maintain the round shape of the brake hose and it won’t be flattened. A flat brake hose is useless for hydraulic disc brakes. In the picture above you see a picture of a hose shortened with brake hose cutter (left) and a hose shortened with cutting pliers (right). As you can imagine, a hydraulic fluid leak can easily occur in the hose on the right of the picture.
-
Place an insert in the brake hose.
After having cut the cable, we use a plastic hammer to place a new insert in the hose. This is a reinforcement at the end of your brake hose. These are included in the package with the brake set. The yellow plastic holders are clamped around the pipe. Then take a pair of water pump pliers to grab the yellow clamps, they prevent you from squeezing the hose itself.
-
Connect the brake hose to the brake lever
Now slide the Magura sleeve nut and the ferrule around the brake hose. Then insert the shortened brake hose into the brake lever. Make sure that the brake lever is facing upwards. This way the brake fluid that is still in the brake lever cannot leak out. The brake fluid from the brake hose doesn’t just run out because it is in a closed system. If you do this correctly, you probably don't even have to bleed the brake set after assembly.
-
Close the ferrule
Close the ferrule with an open-end wrench. Remember to close it really well. On a hydraulic brake hose a pressure of up to 125 bar is reached when braking strongly. So you don't want it to come off and lose your brake fluid, or for it to 'sweat' because it isn't tightened properly.
-
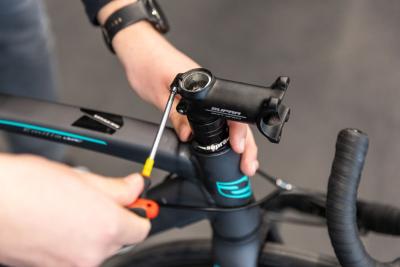
Tighten the brake lever well and centre your caliper
Now that the brake hose is tightened you have to adjust the brake lever to the correct position. After that you can centre the brake caliper. First check if it can move freely and is not tightened too much. Squeeze the brake. The brake caliper will now set itself in the right direction with respect to the brake disc rotor. Hold the brake lever pressed - or let someone else do it - while you tighten the bolts of the brake caliper. Now spin your wheel to check if it can rotate freely. If you don’t hear anything and your wheel keeps spinning well, that’s perfect! In that case you’ve done it all right.
-
Properly position your brake levers
The brake set is assembled. The brake hoses are shortened. Now it’s time to adjust the brake set. The Magura MT Trail Sport brake set has a single finger brake lever, which falls exactly behind the phalanx of your index finger. As a rule of thumb, you can have the brake lever mounted two thumbs away from your grips. If you want to experiment a bit, it is best to bring an Allen key on the first ride.
-
Mounting new disc brakes: the finishing touch
It is important to ensure that your new hydraulic brake cables are securely attached to your frame. It is best to use cable ties for this. Don’t pull them too tightly, once it’s fixed, it’s fixed! Just quickly try if your brake feels spongy or not sprung back well. If that’s the case, then it’s best to bleed your brake set. Fortunately, we could enter the forest immediately after assembly, without bleeding.


Bram van Boekholt
True Trail addict. I'm always looking for new singletracks (preferably as difficult as possible) and under the serious influence of "Enduro-fever." I have two mountain bikes at my disposal: a Trek Remedy and the Cube Reaction. I naturally also have a roadbike, which is a Cube Agree.
Related posts

How To Plan a Route Using Komoot? [How-To]
27 March 2023Planning and finding your own cycle routes sounds more complicated than it actually is ...
Do your own bike maintenance work! [Do It Yourself Tips]
7 February 2023Buying a new road, mountain or gravel bike is one thing. Maintaining your bike properly is another ...
Replace the stem of your road bike in 11 steps [Bike Techcenter]
26 April 2022For road cyclists, being comfortable on your bike is of the utmost importance ...